A great way to make the most out of the G Suite apps is to combine them together in a simple learning flow. By embedding Google Drawings into a Doc you’re able to launch students into pre-selected websites and resources, as well as provide a scaffolded tool to record their thinking and learning.
The role of the teacher in a modern classroom is evolving fairly rapidly these days. One way to describe this change could be as moving from the role of ‘pushing’ information to students, to helping students learn the skill of ‘pulling’ that information and then making sense of it. This is explained really well by John Seely Brown in this interview from 2012.

What’s not changing is the need for the teacher to model and scaffold students to develop these skills. Here are some simple ways you can do this by combining Google Drawings with a Google Doc in a nice learning flow, and seen in this example doc.
1. Embed a Google Drawing as an editable thinking map.
In this doc, linked here, you can see how a student could click on the Venn diagram and add their thinking through the editable text boxes. This Google Drawing was added by selecting the part of your doc that should include the thinking map, and then clicking ‘insert’ and then ‘‘Google Drawing.’
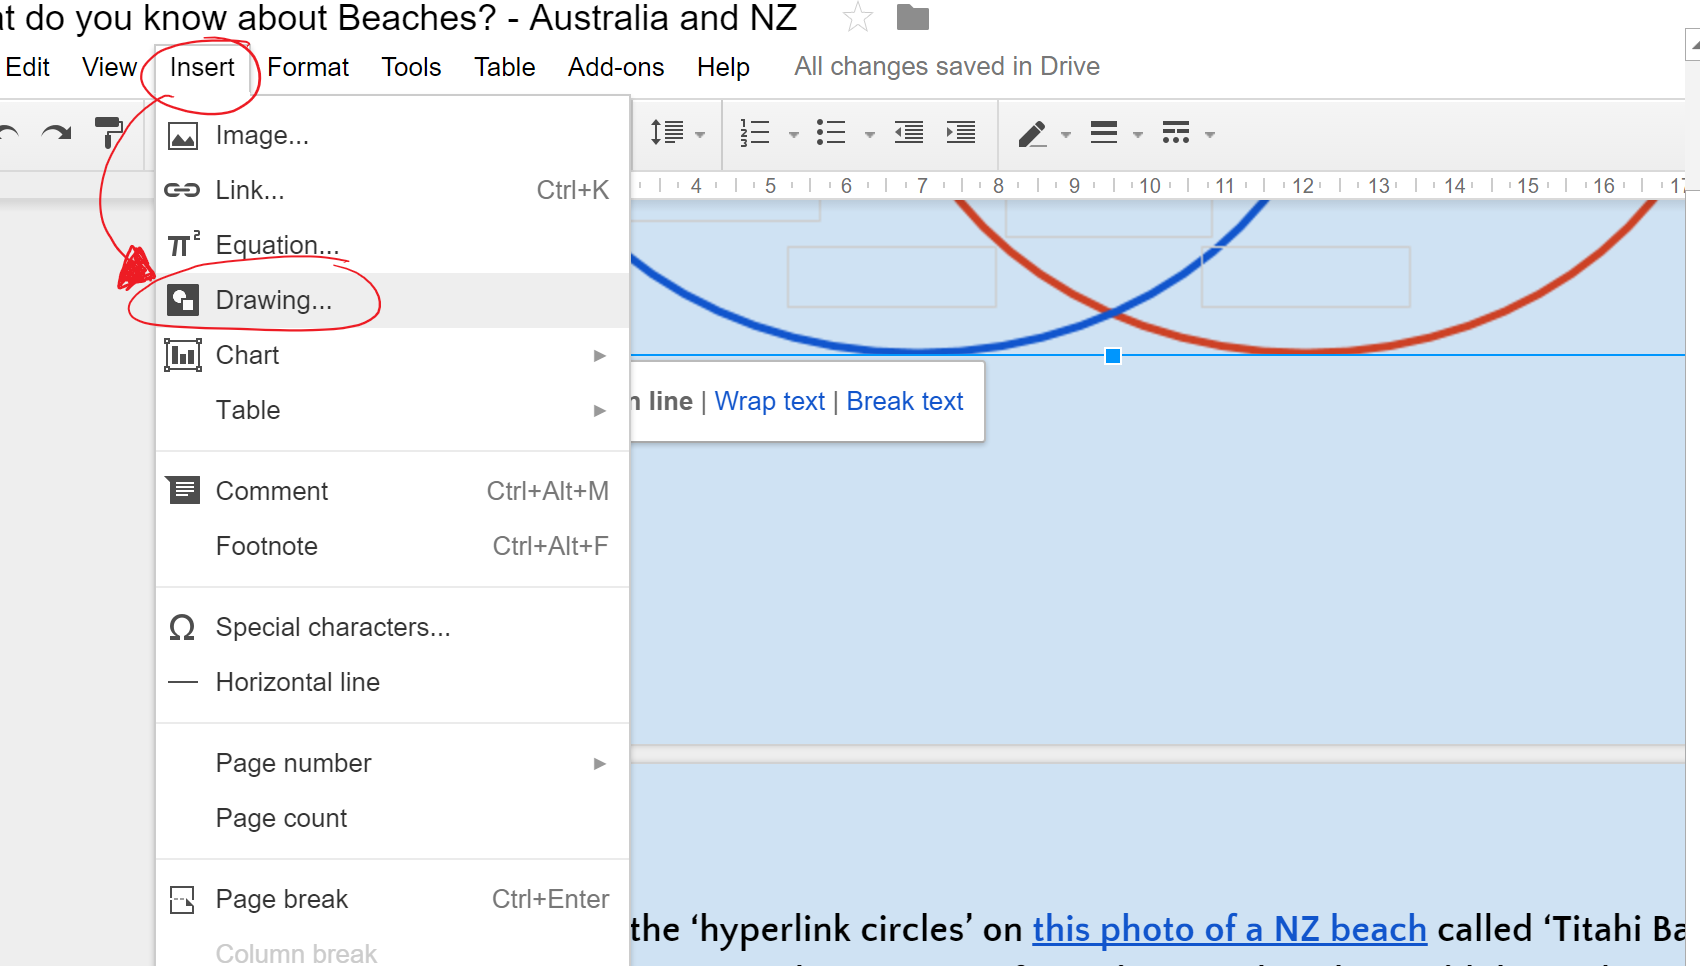
[bctt tweet=”Google Drawings can embedded into Docs as editable thinking maps. See how to do that here!” username=”markherringnz”]
You’ll then see the Drawing edit box open and you can add shapes such as circles, adjust the fill colour and outline and add titles and images if needed. The last step is to add a text box, adjust the size and shape and add an outline so the student can see it. Then, once you’ve copied the box, paste it multiple times for the student to edit later.
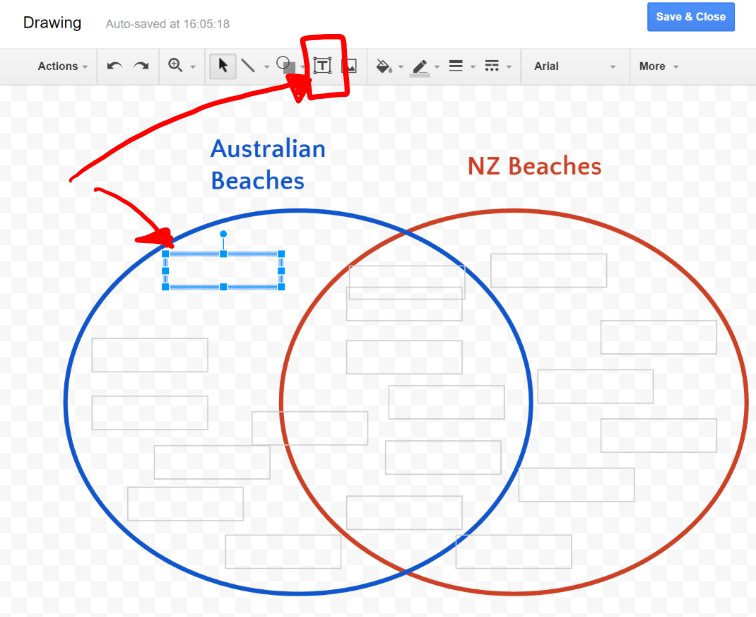
2. Create a Google Drawing as a hyperlinked PDF.
A hyperlink is a shape or text that, when clicked, will take you to something on the internet. If you start a Google Drawing from your Google Drive (another way to start a Drawing) you will be able to download it when completed as a PDF with these clickable links.
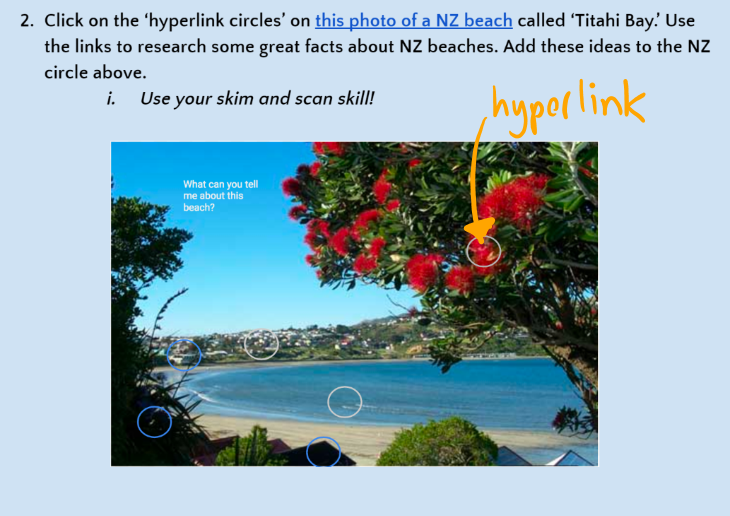
[bctt tweet=”Did you know you can bring an image to life with clickable hyperlinks for viewers to find out more?” username=”markherringnz”]
After inserting an image into your Drawing, your next step is to find the sites and resources online you want your student to use that can explore the image in more depth. In the example doc I’ve used an image of Titahi Bay Beach and created hyperlinked shapes to Wikipedia pages, the NZ History page and a local news site that gives a ton of further images, videos and information. Here are the steps to create this yourself.
– 1. Create a transparent shape (i.e. a shape with no fill) over the part of the image you’d like to hyperlink by adding a shape and changing the fill with the paintpot to ‘transparent. You can make the shape have an outline so the student can see that there’s something there to be clicked, or make it invisible, which can be an easy way for the actual image to look like it’s hyperlinked itself.
– 2. Copy the site’s URL that you want to link to using CTRL C, (CMD C on a Mac) and then click the transparent shape on the Drawing.
– 3. CTRL K will open the link box and a simple paste (CTRL V) will insert the link. You can also go to the hyperlink icon in the top menu bar and paste it that way.
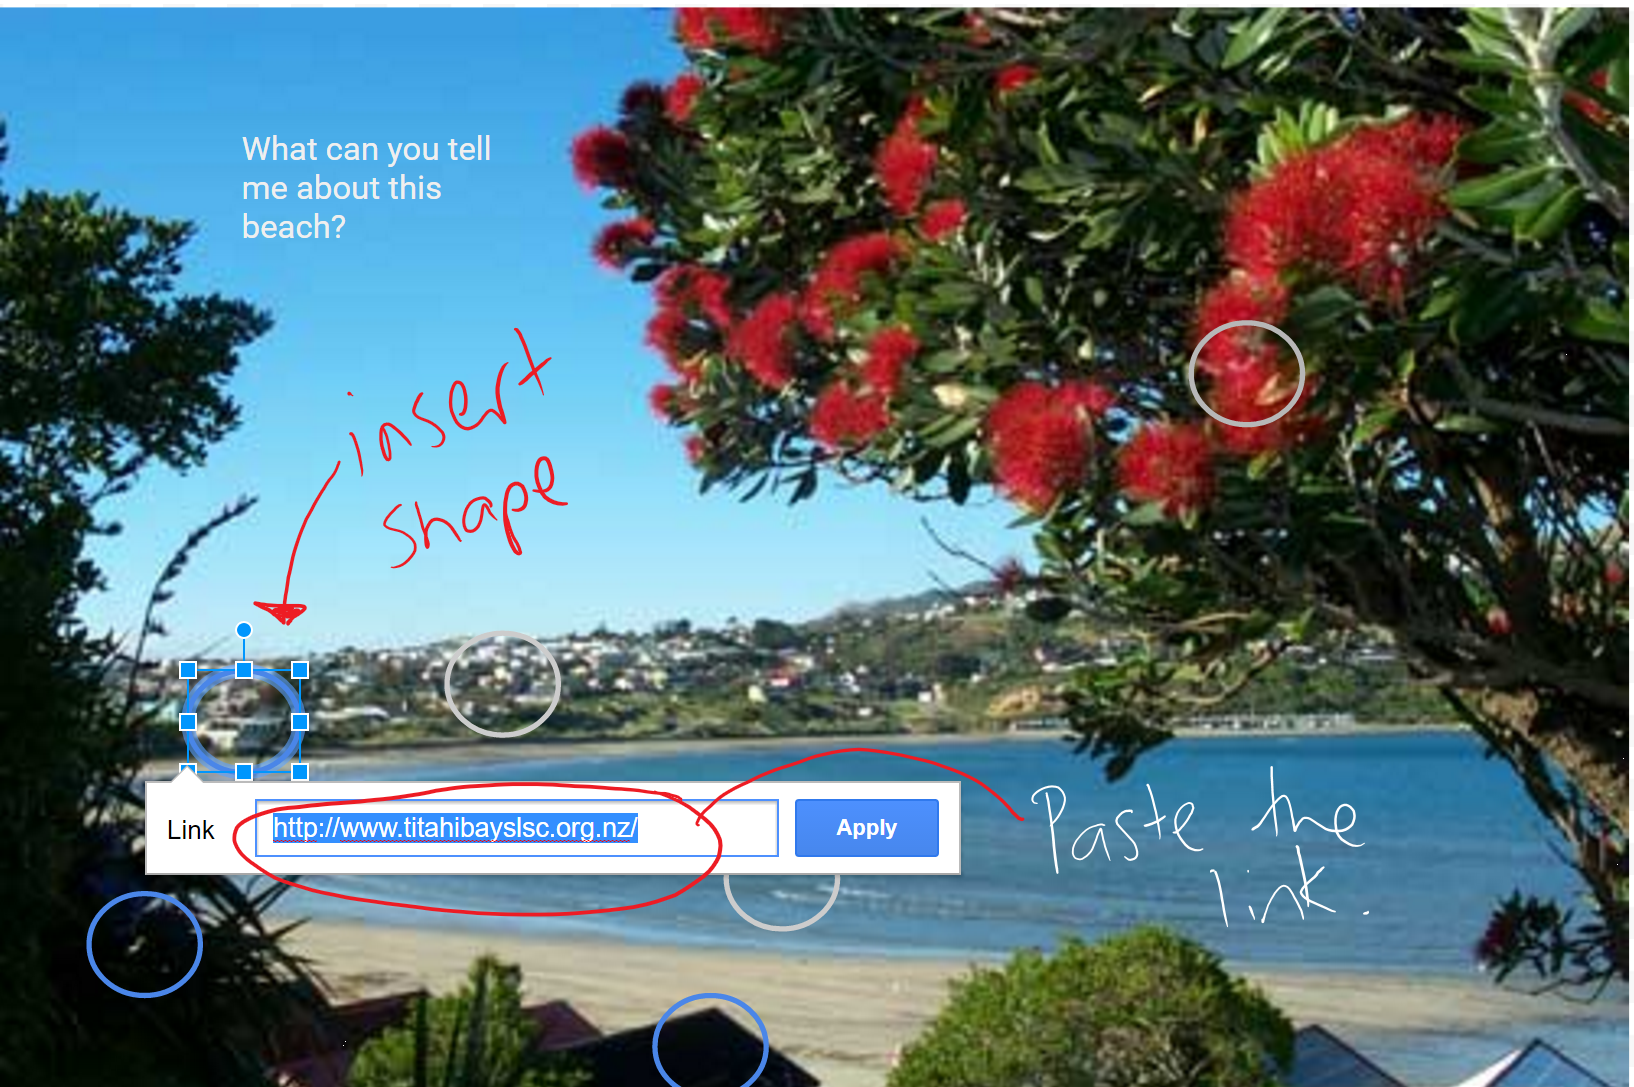
When you have the hyperlinks created on your Drawing, click ‘file’, ‘download’ and then ‘PDF.’
This will save the Drawing to your downloads folder you can then upload this to your Google Drive and copy the sharing link. You can now return to your Google Doc and use the sharing link to hyperlink both a screenshot of your drawing and some highlighted text so that it opens the PDF when the students click on it.
Embedding Google Drawings into your Google Docs will help expand the content and depth of learning for your students. In some circles this could be called ‘App Smashing’ – where you combine content from one G Suite app with another. It’s a great way to amplify and augment (see the SAMR model – explained here for more) your teaching practice – it could be your next step in tech integration!
