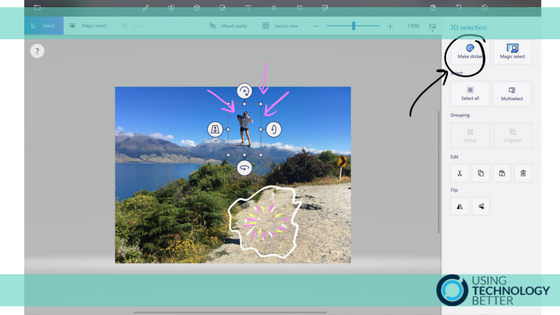
This post will show you a fun and quick activity to help students develop ideas for creative writing and become familiar with the Microsoft Paint 3D workspace. We’re going explore using the ‘Magic Select’ tool to turn one part of an image into a sticker and then put this on a background of your choosing.
This is a really motivating activity for descriptive or recount writing. A few ideas…
- Descriptive writing about a place they are learning about (city, habitat, planet)
- Postcard from a place they would love to visit
- Go back in time to an event in history
- Place themselves in a dangerous situation
- Make themselves miniatures (or giants) in a fantasy land
1. You will need to have two images ready in your files to use. One that you are going to take the person from and make into a sticker and the second as a background image for where you want to be.
2. Open Paint 3D. If you don’t already have this on your Windows device you can get it in the Microsoft Store. You’ll need to be running Windows 10 or later.
3. Click on the ‘File’ menu in Paint 3D – it’s the folder icon on the top left corner of the screen.
4. Select ‘Open’ -> ‘Browse Files’, then find the image with the person and select this. This will open the file in Paint 3D.
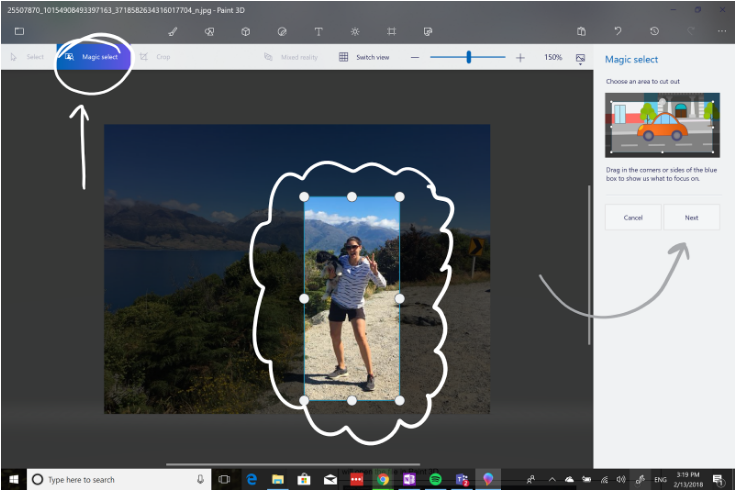
5. Click on ‘Magic Select’. A menu will pop up on the right of your screen. Move the white dots so that you have a box around the person. Then click ‘Next’.
6. You will be asked if you would like to refine your selection. You can add more or delete areas from what has been selected. When you’re happy with the selection click on ‘Done’.
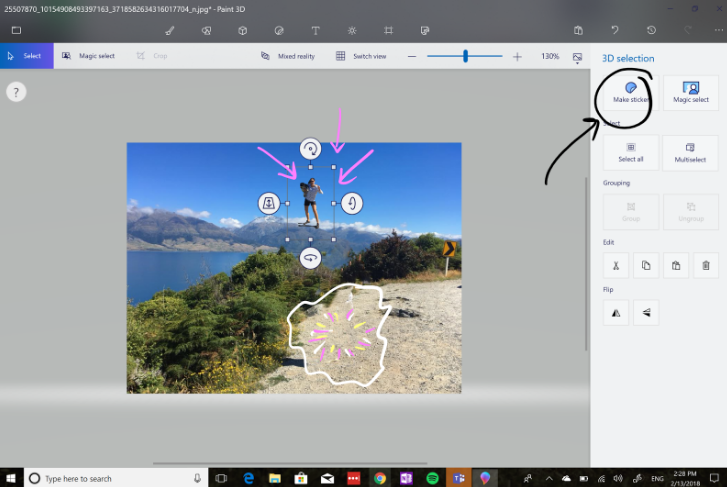
7. Now you can move around the person and resize it. You’ll notice that Paint 3D has filled in the background of where you were. Keep this in mind for other activities!
8. Click on ‘Make Sticker’ on the right of the screen.
9. Now you need to go back and open a new page with the image you have selected for your background on it. Head back to ‘File’ -> ‘Open’ -> ‘Browse Files’ and then select your background image.
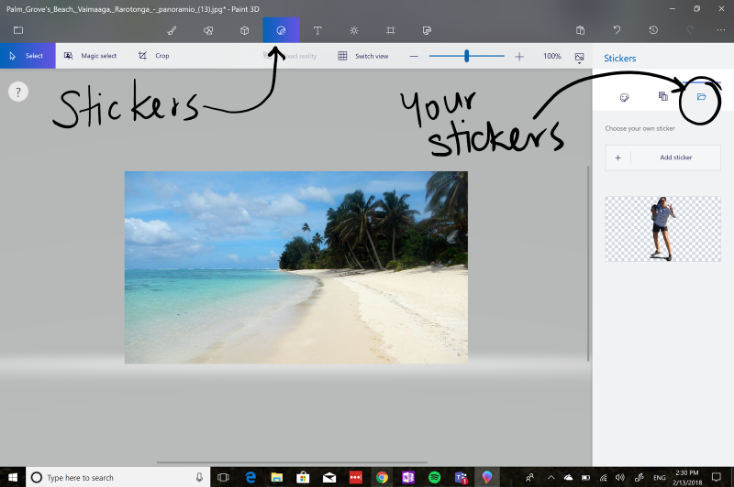
10. The top menu has several options. The fourth one along is stickers. Select this then the third option on the pop out menu. This will show you the stickers you have made. Click on the person.
11. Resize and move around your sticker until you are happy with the placement.
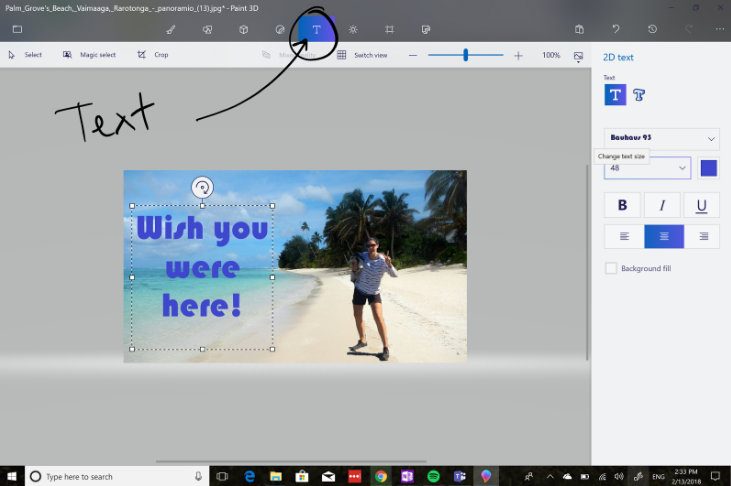
12. Now add some text with the Text menu.
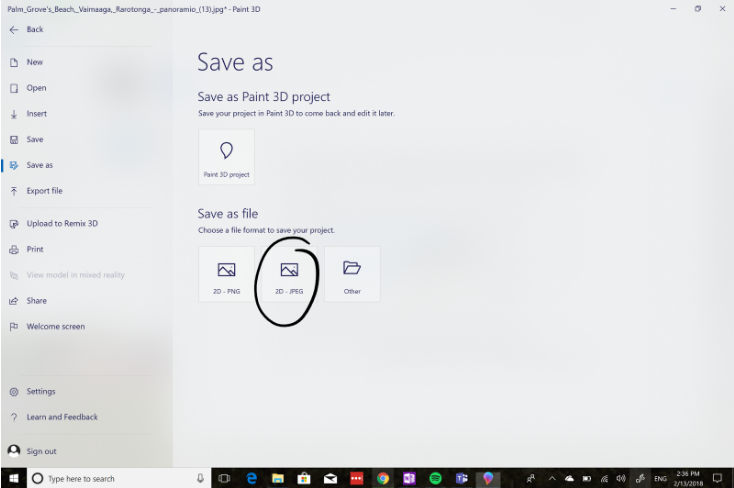
13. When it’s ready to go, head back to the ‘File’ menu – > ‘Save as’ and select how you’d like to save it. In this case a JPEG file is probably a sensible way to go.
14. Use these images as a prompt for student writing. The only thing left to think about is how you will share these with others when they are finished. There are loads of ways to share them digitally or you may even like to print them and send them home via snail mail. Everyone loves getting something in the post!
[bctt tweet=”Using Microsoft Paint 3D is a great way to help students generate ideas and stay motivated when writing!” username=”lara_kirk”]
Enjoyed using Paint 3D? Download the UTB app (iOS or Android) so you are kept up to date with blog posts. This is the first in a series of posts I’ll be writing about the cool features of this powerful tool.
Or better yet – come along to one of our Microsoft STEAM days where we explore not only Paint 3D but also Minecraft and other Microsoft tools for education. Find an event near you here.


