A very common question at my training sessions is ‘How do you transfer data between Google accounts?’ This usually comes from a teacher who began using their personal Google Drive for school purposes and now has a school G Suite account, who is planning on moving schools, or has students who are graduating and want to take their data with them.
In this two-part series I’ll cover everything you need to know about moving data between Google accounts. This includes data in Gmail and Google Drive.
Part 1 (this post) will cover how to transfer Gmail and Google Drive data from a G Suite for Education account (i.e. a school account) to another Google account (personal or G Suite).
Part 2 will cover how to transfer Google Drive data from a consumer Google account (i.e. your own personal Gmail account) to another Google account (personal or G Suite).
So let’s get started!
Transferring Gmail and Google Drive data from a G Suite for Education account to another Google account
Google’s content transfer tool allows you to transfer email and Google Drive files from your school Google account to another Google account. This includes all your emails in Gmail, the documents you own in Google Drive and files in My Drive that you have edit access to. Files you access via a Team Drive, Shared with me or only have view access to will not be transferred. The transfer tool works by making copies of the files, so any changes you make to the copied files won’t affect the originals, and vice-versa.
Note: This tool is only available when transferring data from a G Suite for Education account. If you want to transfer Google Drive data from another type of account, check out ‘Transferring data between Google accounts – Part 2’.
To access the content transfer tool:
1. Login to the G Suite for Education account you want to transfer content from.
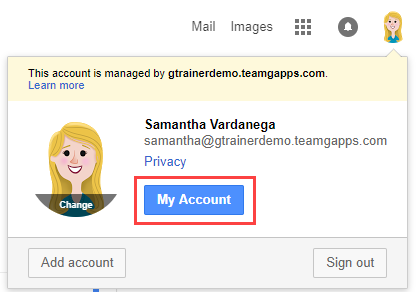
2. Click on your profile image (top right corner) and choose My Account.
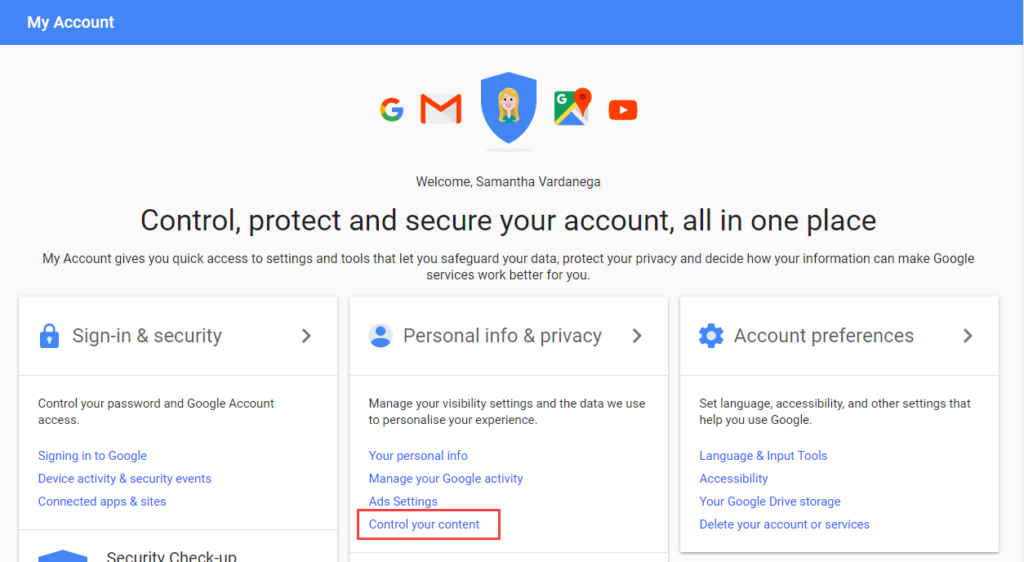
3. Locate the Personal info & privacy section and click Control your content.
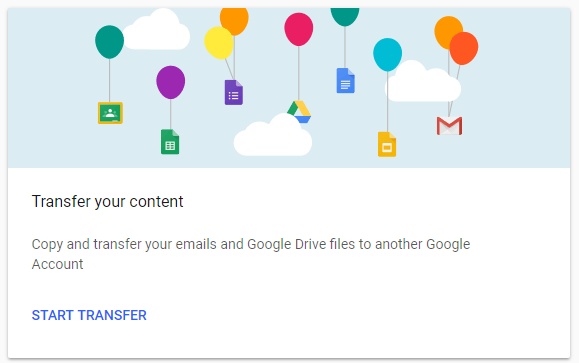
4. Locate the Transfer your content box and click Start transfer.
5. The Transfer your content tool will launch, as shown below.
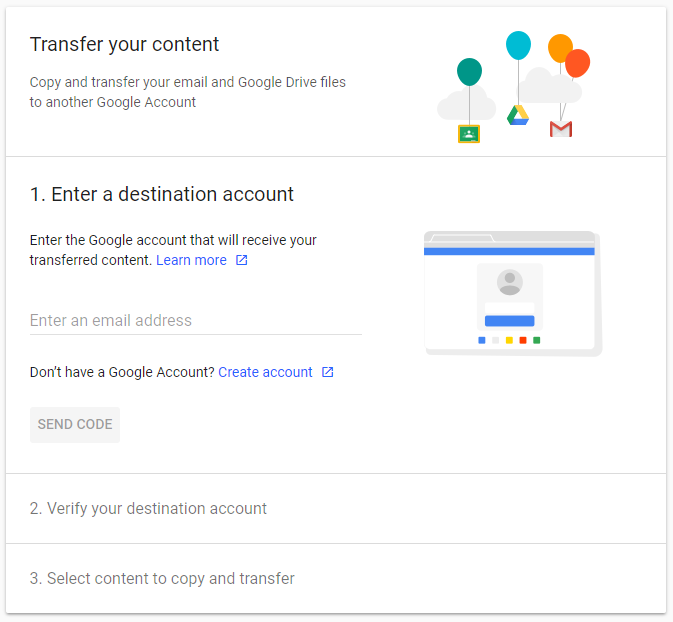
6. Enter the email address of the Google account you want to copy the data to.
7. Click the Send code button.
8. Open the email account entered in step 6 and locate the email with the confirmation code. An example is shown below.
Note: We suggest opening the second Google account in a Chrome Incognito window, or a separate Chrome profile to avoid conflicts between accounts.
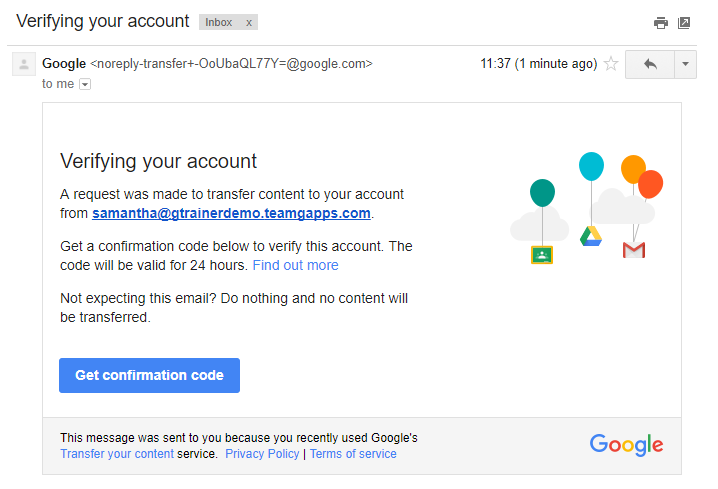
9. Click the Get confirmation code button.
10. A new tab will open with the confirmation code. Copy the code and close the tab.
Note: This code is only valid for 24 hours.
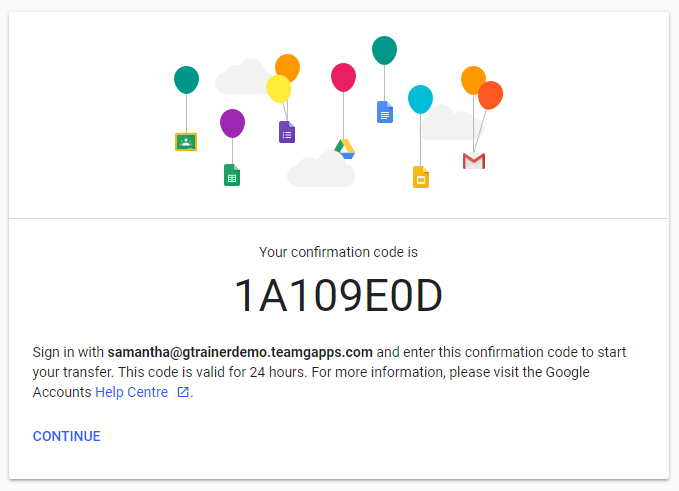
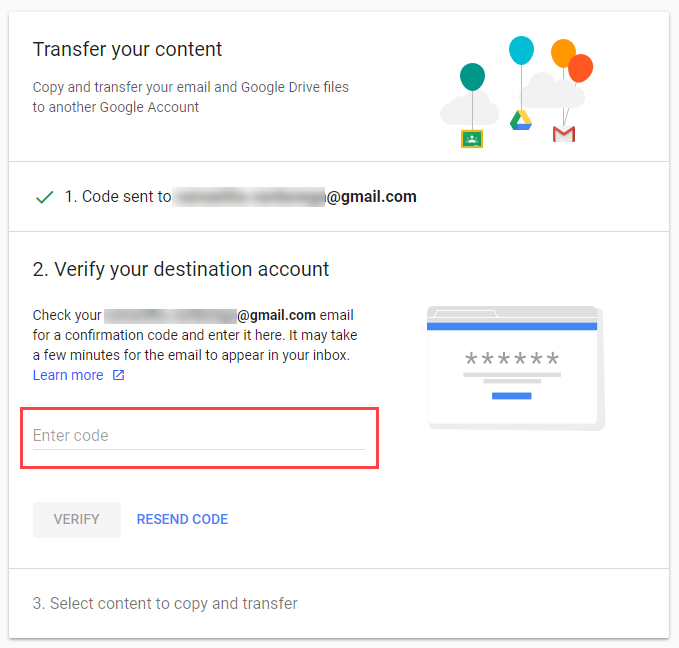
11. Return to transfer your content tool in your school’s Google account. Paste in the code you copied in step 10 and click the Verify code button.
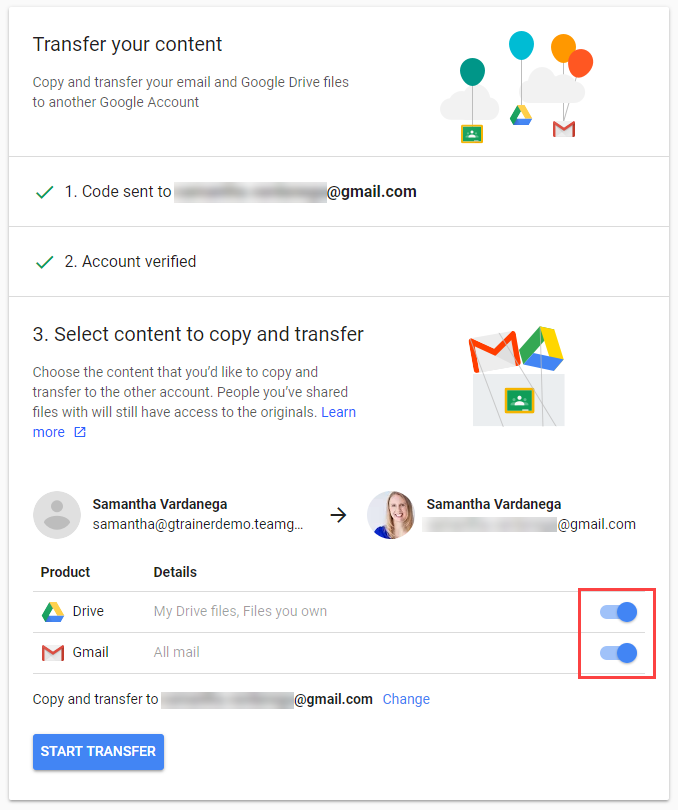
12. Select the content you want to transfer.
13. Click the Start transfer button.
The transfer process will now begin. It will usually be completed within a few hours, but can take up to one week to finish. This will depend on the amount of data you are transferring. You will notice your copied data gradually begin to appear in your Google account during this time. Transferred emails will be put in a label in Gmail with the name of your school account and the date you started the transfer. Transferred Drive files will be put in a Google Drive folder with the name of your school account and the date you started the transfer.
You will receive an email when the transfer process is complete. This will include a list of any Google Drive files that were not transferred. You can then transfer these using the method outlined in the next blog post in this series.
If you want to learn more about the transfer content tool, see this Google help article.
In the next post in this series, we’ll take a look at how to transfer Google Drive data from a consumer Google account (i.e. your own personal Gmail account) to another Google account (personal or G Suite).
