Google Docs, Sheets, Slides and Forms all have a range of great-looking templates that can help make teacher’s administrative work a bit quicker and easier. In this post, I’ll show you how to access templates and share five of my favourites.
Accessing templates
Templates are accessible via the Docs, Sheets and Slides web and mobile apps, and the Forms web app. You can access the web apps from the App Launcher button, or using the links above.
Tip: The Google Forms app icon is usually shown in the ‘More’ section of the Apps Launcher.
You can also now access templates from the New button in Google Drive. Click New > select the type of file (e.g. a Google Doc) and select From template.
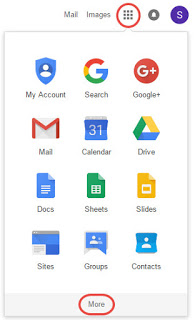
Once you have opened the appropriate app, you will see the templates displayed at the top of the screen. Click the More button to view all templates.

The template gallery has two sections, General and templates in your organisation. Select General to see templates in the public galley. Click on a template to create a new file. It will automatically be saved in your My Drive. You can rename the Doc, Sheet, Slide or Form to suit your purpose, then customise the template as much as you like!
Template 1: Meeting Notes (Google Docs)
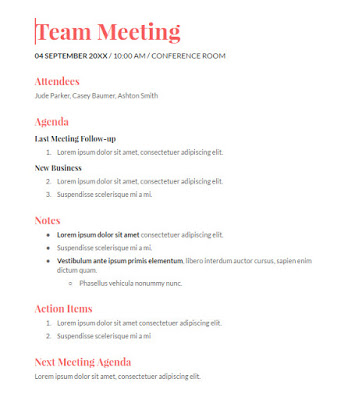
Few people enjoy attending meetings, but it’s a necessary part of most teachers job! A good agenda and minutes system can help keep things on track and ensure you make the most of everyone’s precious time. The Meeting Notes Google Doc template makes it quick and easy to record meeting attendees, agenda items, discussion points and action items.
Note: This is just one example of a Meeting Notes template, there are currently three to choose from.
Template 2: Attendance (Google Sheets)
This template is great for teachers who are still marking the role on paper! Its simple to set up:
1. Copy and paste your students names into the Class 1 tab.
2. Enter your term/semester dates in row 2 of the Class 1 tab. A few tips for this:
– If you enter the date into row 2, the day of the week will update automatically.
– Put in your first date as a Monday, then click on the little blue box in the corner of the cell and drag your cursor across the next four rows. This will automatically complete the dates for the rest of the week. Repeat the process for each week.
– When you get to the end of the dates, use Insert > Columns right to add more. Use the click and drag method (see above) to continue copying the date and days from rows 2 and 3.
3. Rename the Class 1 tab to the name of your class (click on the tab and select Rename).
4. Make a copy of the Class 1 tab for your other classes (click on the tab and select Duplicate), rename the new tab and update the student names.
5. Click on the Attendance key tab to customise the letters and wording for your situation.

Template 3: Grade book (Google Sheets)
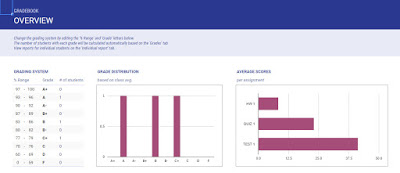
The Grade book template is by far the most popular with the teachers I meet! Again, it’s easy to get started with:
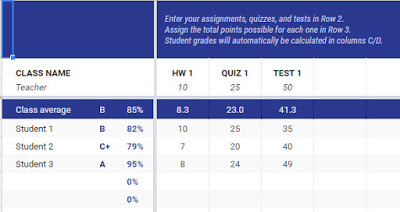
1. Customise the grading system on the Overview tab to meet your needs.
Tip: You can delete grades you don’t need and/or update the ranges. You could also replace the letter grades with numerical ones.
2. Copy and paste your students names into the Grades tab.
3. Enter the names of your assessments, quizzes, tests, homework etc. in row 2
4. Enter the total points available for the task in row 3.
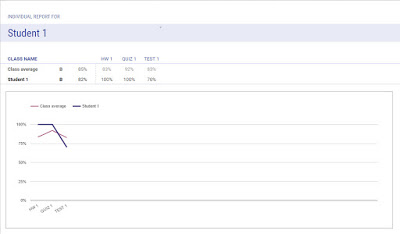
5. Start entering student grades! All the other information in the sheet will update automatically. The Individual report tab displays a graph for each student, mapping their progress against that of the class.
Note: If you’re a beginner with spreadsheets, it’s probably easiest to create a new Grade book for each class (by clicking on the template). If you’re more advanced, you could duplicate the Grades and Individual report sheets for other classes and update formulas accordingly.
Template 4: Student certificate (Google Slides)
This is a simple certificate template which you can easily update with your school colours, logo and the award information:
1. Right-click the globe image and select Replace image. Browse for an image that suits your needs (e.g. your school logo or an on-topic image).
2. Click on the big blue rectangle or green stripe. Use the paint can button to change the fill colour (e.g. to your school colours, or the student’s favourite colours!)
3. Update the student name and other text.
4. If you need to make certificates for other students, select the Slide menu > Duplicate slide. Update the new slide as required.
5. Select File > Print to print your certificates.

Template 5: Course evaluation (Google Forms)
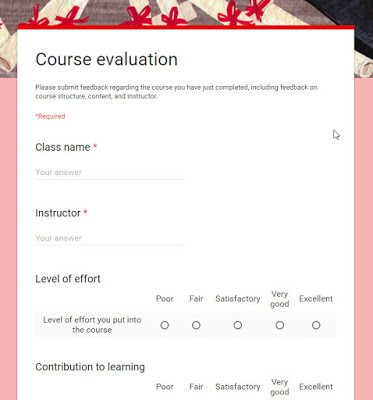
Student feedback is one of the most powerful tools for teacher reflection and improvement. The course evaluation template has a basic set of feedback questions which you can customise to suit your class:
1. Update the title to include the name of your class (e.g. “9B Science feedback”)
2. Add a friendly description, including a note about whether the feedback is anonymous.
3. Click on each question and amend the text accordingly.
4. Use the + button to the right to add extra questions.
5. Click the cog button in the top right of the screen. Change the settings as required.
Tip: If you want the feedback to be anonymous, make sure you don’t tick the ‘Automatically collect respondent’s username’ box!
[bctt tweet=”Here are five of my favourite Google Drive templates for teachers” username=”samvardanega”]
6. Click the Send button. From here you can either email the form to your student’s, or copy the link to the form and put it in your learning management system or similar.
Tip: If you use the email form option, don’t tick the ‘Include form in email’ option. Doing so embeds the form questions in the email, which means your students don’t see the nice theme!
