Gmail’s Priority Inbox was launched way back in 2010 with the promise of helping you get through your emails faster. The default configuration is centred around stars and Gmail’s importance markers, a feature which can automatically identify emails which are likely to be important to you. However, this is not the only way to use Priority Inbox. In this blog post, we’ll show you how to customise Priority Inbox to suit your email flagging and follow up system and boost your efficiency.
Want to watch the video instead? Check it out here or scroll down to the bottom of the page.
Step 1 – Enable Priority Inbox
If you’re not already using Priority Inbox, you can enable it by following these steps:
1. Hover your mouse of the Inbox label and click the little arrow that appears on the right.
2. Choose Priority Inbox.

You’ll notice that your inbox changes to sort emails into three separate sections:
- The ‘Important and unread’ section displays all your emails that are both unread and important (as per Gmail’s automatic importance classification). You can learn more about these importance markers here.
- The ‘Starred’ section displays emails you have put a star on.
- The ‘Everything else’ section displays all other emails in your inbox.
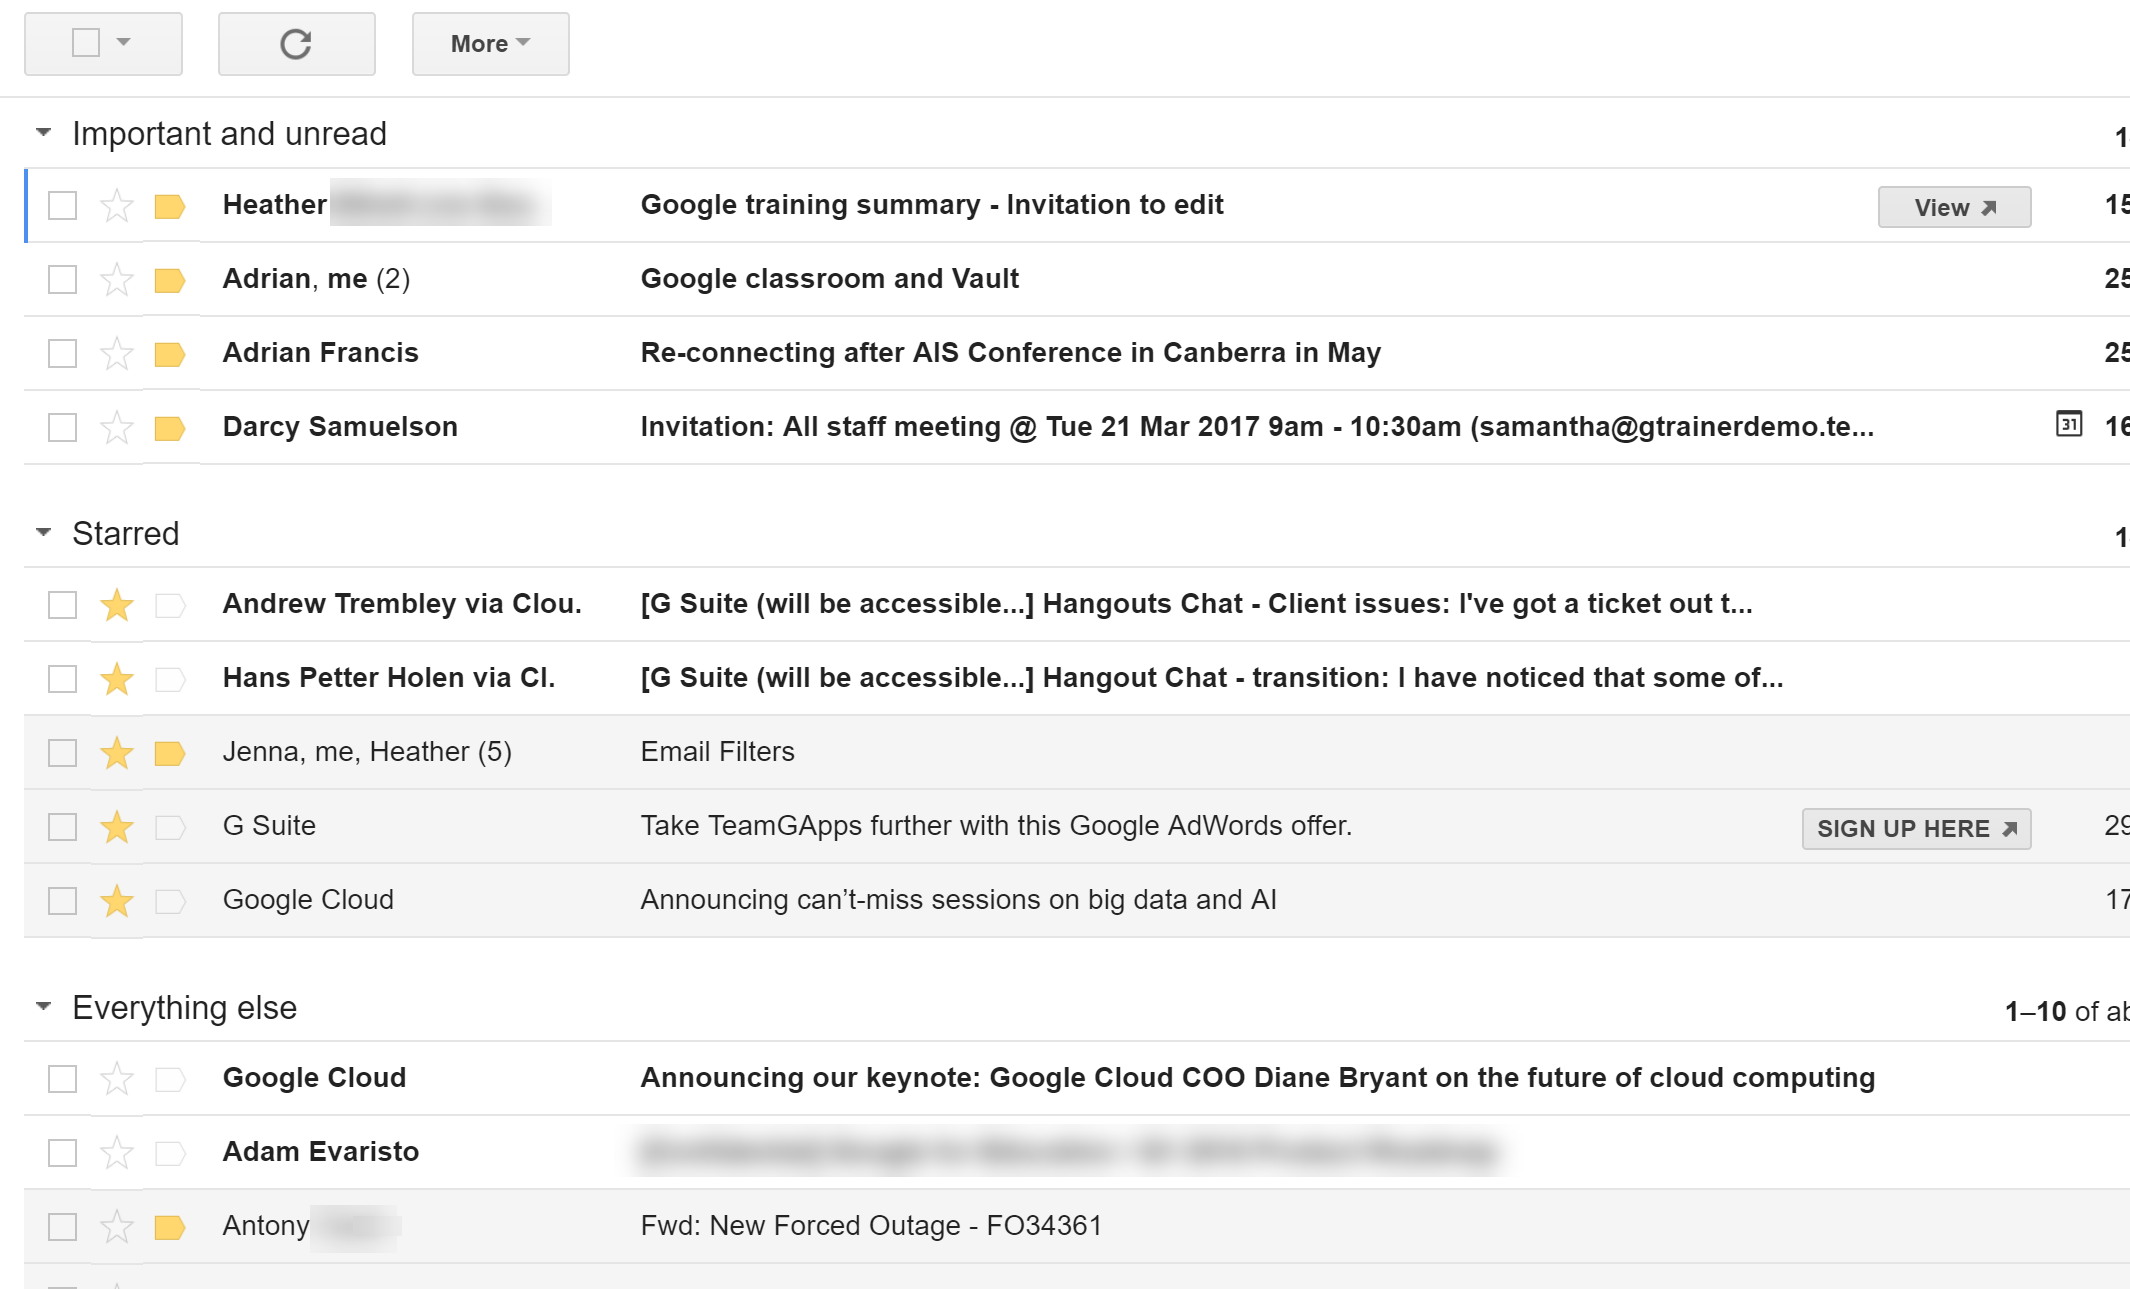
This is the default Priority Inbox configuration. Now let’s take a look at how to customise the sections.
[bctt tweet=”Did you know you could customise the #Gmail Priority Inbox? Here’s how to do it and boost your efficiency!” username=”samvardanega”]
Step 2 – Access Priority Inbox settings
Follow the steps below to access the Priority Inbox configuration:
1. Click the Settings (cog) button and choose Settings from the menu.
2. Select the Inbox tab.
At the top of the Inbox settings tab you’ll notice that Inbox type is set to Priority Inbox. Under this you can choose what is displayed in each of the four Priority Inbox sections. The default configuration is shown in the image below:
Step 3 – Customise Priority Inbox settings
You can customise what is shown in each of the four sections by clicking on the Options link on the right of the section name and choosing another option from the list. For example, if you are not using Gmail’s importance indicators, you could choose to have the first section display all your unread mail (instead of unread and important), as shown below.

The second and third sections can be customised to suit your chosen mail tagging and follow up system. If you use stars to flag emails that need follow up, you may want to leave the default setting as is. However, if you use labels to flag your emails (e.g. the coloured label flagging system outlined in this post), you can remove the stars section and replace it with a label instead. You could then even add another label to the third empty section.
Click More options in the menu to choose a label.

In the example configuration below, ‘Follow up’ and ‘Waiting for’ labels have been added to the Priority Inbox.

Here’s what the configuration looks like back in the Inbox.
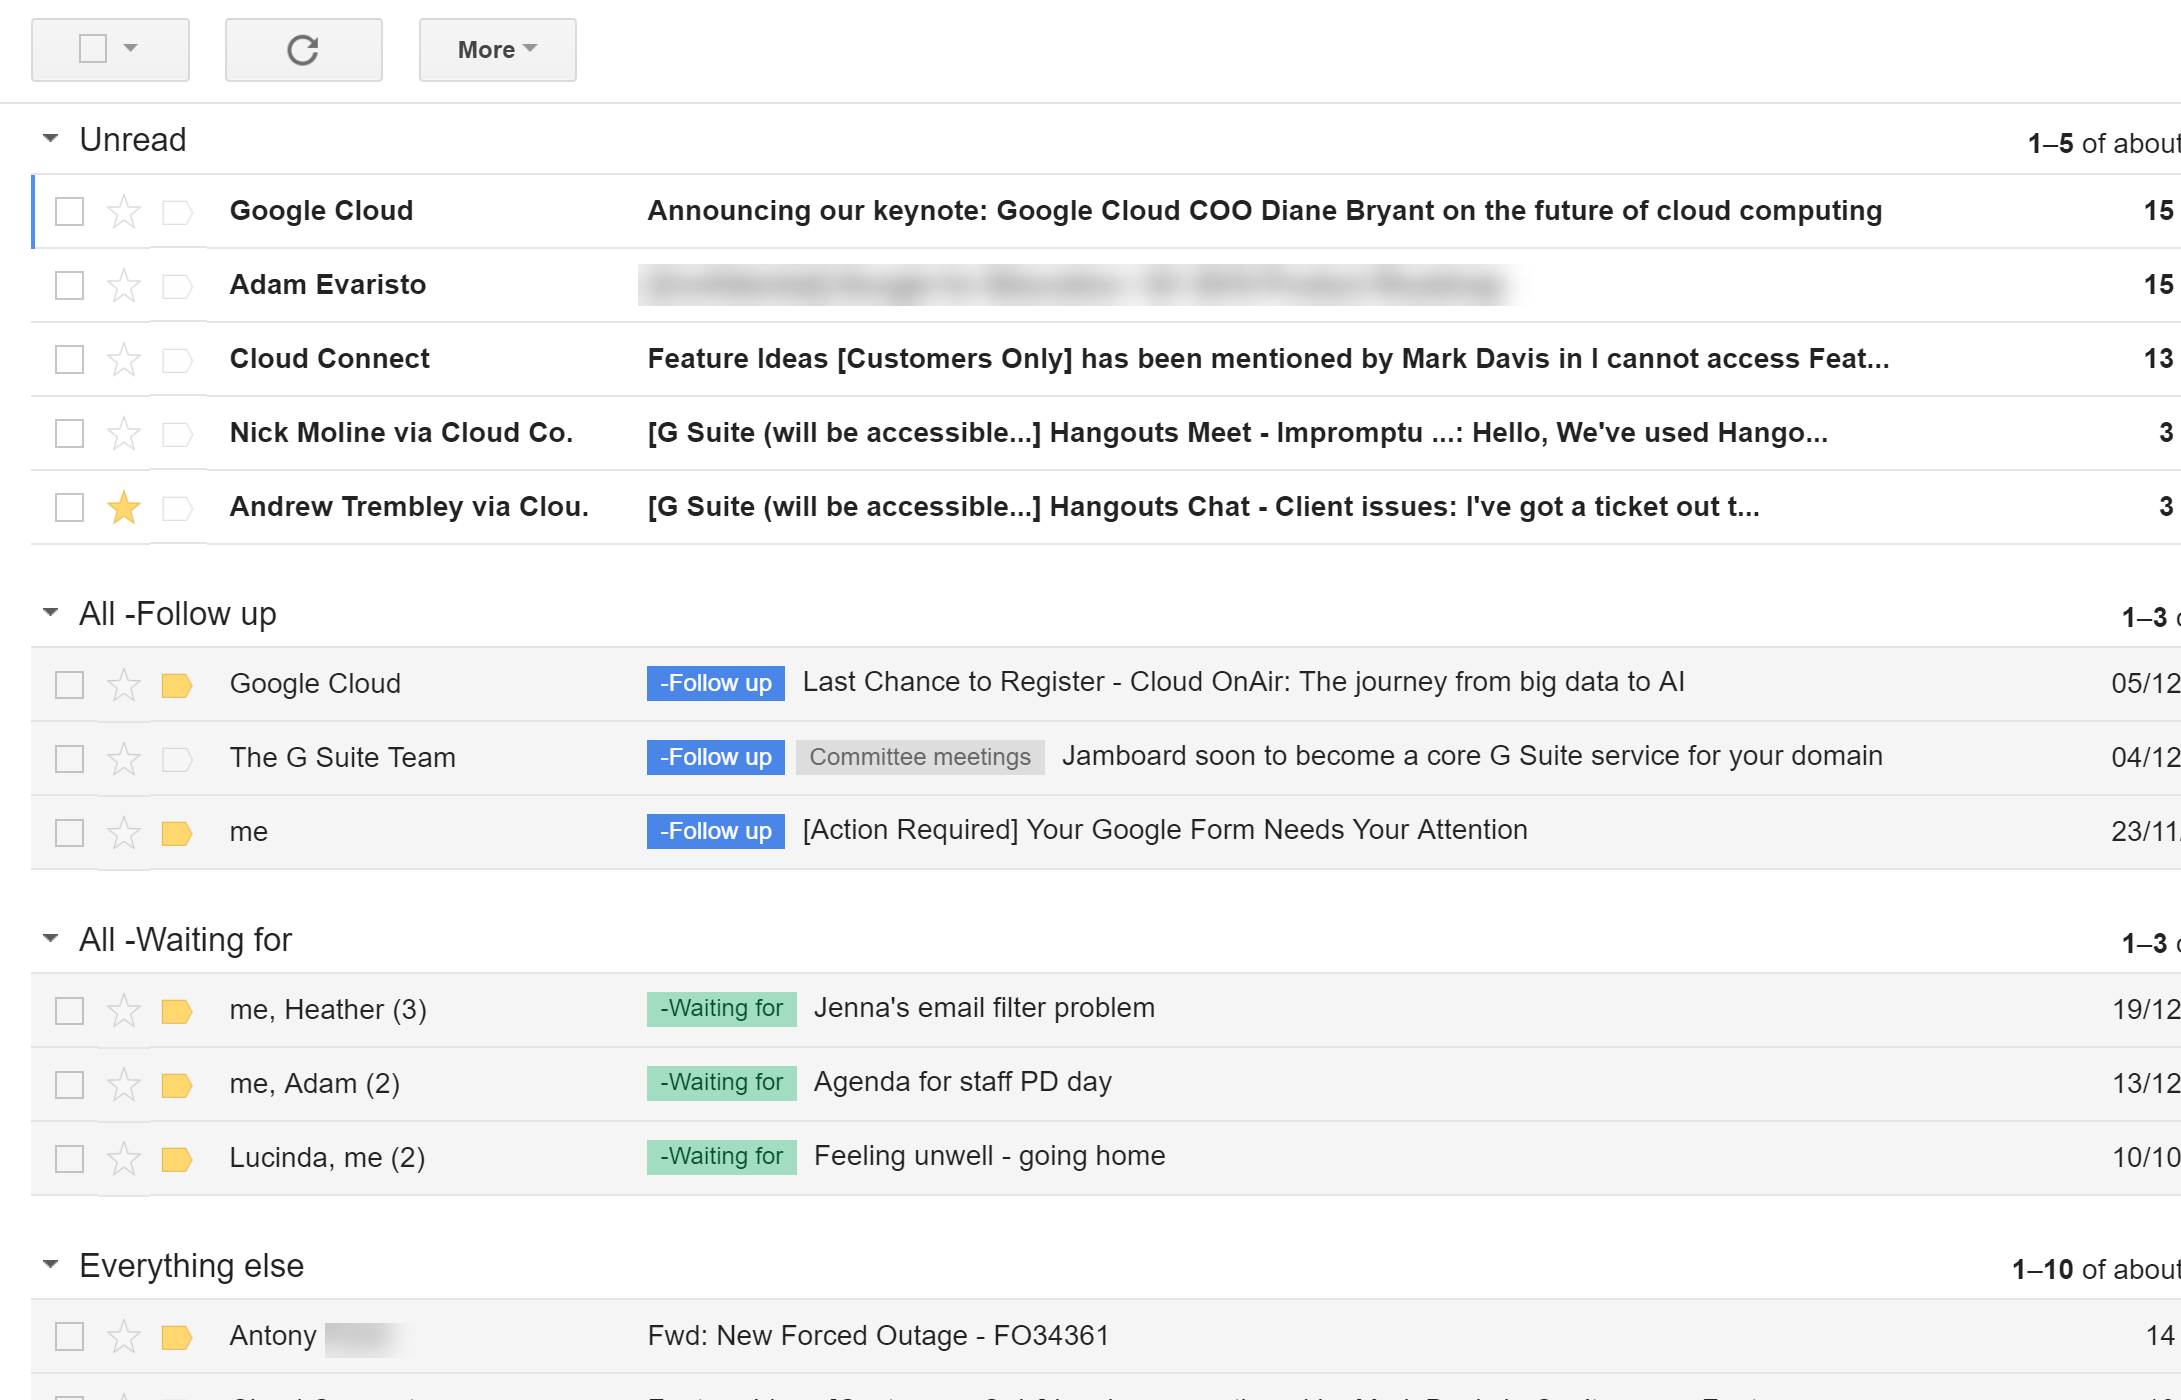
The advantage of this configuration is that emails requiring or awaiting action are still highly visible in the inbox, but are clearly separated from unread mail. This makes it quicker to process all your unread mail and easier to find and action emails that you’ve flagged for follow up.
[bctt tweet=”Customise the #Gmail Priority Inbox to display the labels you use to flag emails that require follow up.” username=”samvardanega”]
This is just one of many possible configurations for Priority Inbox. The key to using it to boost your efficiency is choosing a configuration that works for your unique email management practices.
Are you feeling overwhelmed by emails and want to learn how to better manage your Gmail Inbox? Check out our Get efficient with Gmail the SMART way online course!
Prefer to see this in action?
Check out the video below.
