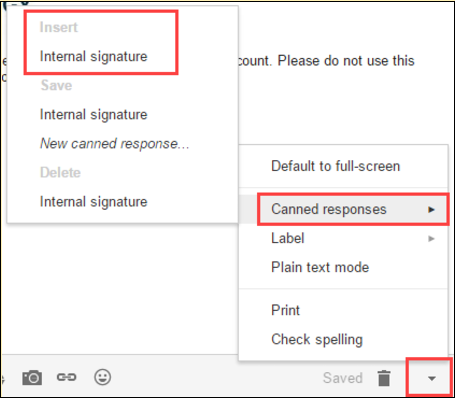
Don’t want to read the whole post? Here are the steps:
1. Enable Templates in Gmail settings (Advanced section).
2. Disable your existing signature (optional).
3. Create a new email message, leaving the subject field blank.
4. If you didn’t disable your existing signature, delete it from the email message.
5. Create a few blank lines in the message, then write (or paste in) your email signature.
6. Click the little grey arrow in the bottom right corner of compose window and choose Templates > Save draft as template > Save as new template.
7. When prompted, enter a name for the template and click OK.
8. Discard the email using the trash can button at the bottom.
9. Repeat steps 3-8 for your other signature(s).
10. To insert the signature, compose your email and then the little grey arrow in the bottom right corner of compose window.
11. Choose Templates and click the name of the template in the ‘Insert Template’ section. The signature will be added to your email.
—-
A common question I get asked when training our corporate and government clients is ‘Can I have multiple signatures in Gmail?’. These people usually need different signatures for internal and external correspondence, or have multiple job roles which require different titles in the signature. While Gmail doesn’t have a dedicated multiple signature function, the good news is that you can use the Templates feature instead. In this blog post, I’ll show you how to use Templates to create and insert multiple signatures.
Note: There is one circumstance in which Gmail does give you the ability to create multiple signatures. If you are using the ‘Send mail as’ feature to send email using a different address, you do get the option to add a section signature in the General settings. However, if you are just using the one email address, the Templates option is for you!
Tip: If you’re looking for a tool to easily make a professional looking signature, you can use online generators like Newoldstamp and create an impressive, interactive signature in less than 5 minutes.
[bctt tweet=”Here’s a solution for creating multiple signatures in Gmail” username=”samvardanega”]
Part 1: Enable Templates
1.Click the Settings (cog) button and choose Settings from the drop-down list.
2. Select the Advanced section.
3. Locate the feature called Templates and select the Enable radio button. Scroll up or down and click Save changes.

Part 2: Disable your existing signature [optional]
The step is optional. If most of the time you will use one signature, and only occasionally use another one, you might want to leave your existing signature in place and just use a template for the lesser-used signature. However, if you will frequently be switching between the two signatures, I suggest setting them both up as templates.
If you want to disable your existing signature:
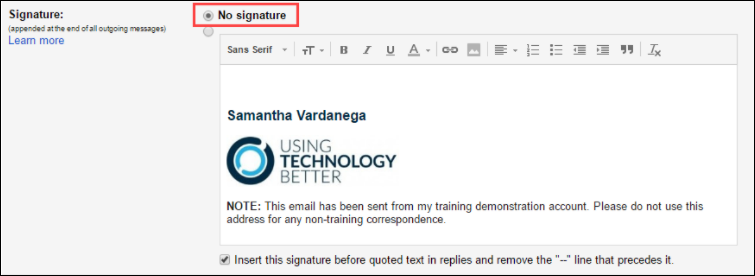
- Click the Settings (cog) button and choose Settings from the drop-down list.
- Scroll down to the Signature section and select the No signature option.
Tip: While you’re here, you might want to copy your existing signature so that you can paste it into a template.
Part 3: Create the Template
1. Create a new email message, leaving the subject field blank.
2.If you didn’t disable your existing signature, delete it from the email message.
3.Use your Enter key to create a few blank lines in the message, then write (or paste in) your email signature.
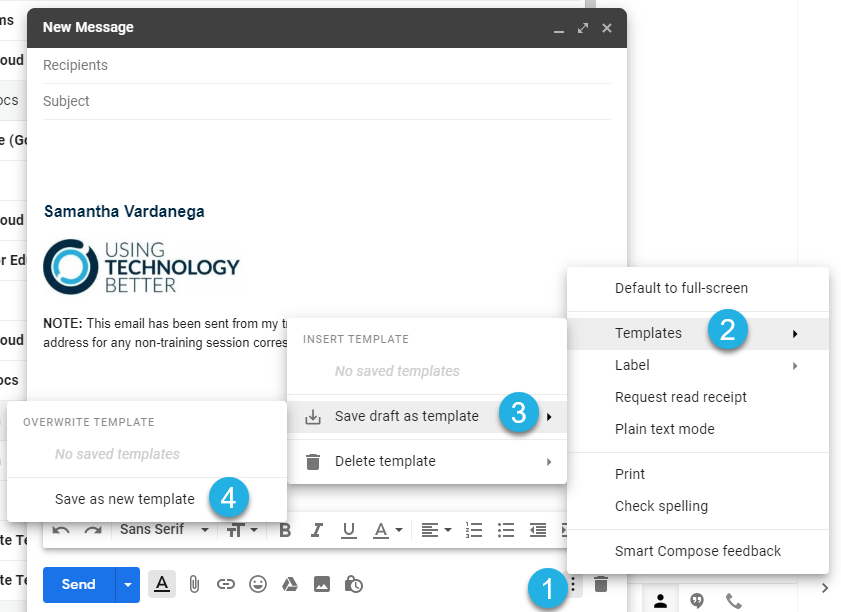
4.Click the little grey arrow in the bottom right corner of compose window.
Choose Templates > Save draft as template > Save as new template.
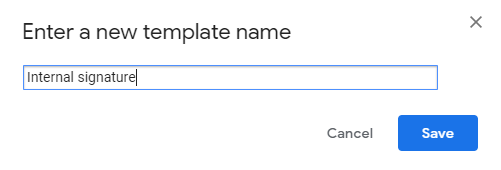
6.When prompted, enter a name for the template and click OK.
7.Discard the email using the trash can button at the bottom.

8.Repeat steps 1-7 for your other signature(s).
[bctt tweet=”Yes! You can have multiple signatures in Gmail. Here’s how.” username=”samvardanega”]
Part 4: Insert the signature
After you have created templates for all your signatures, follow these steps to add a signature to an email:
1.Compose your email and add your content.
Tip: If you prefer, you can also put your signature in before adding any content.
2.Click the little grey arrow in the bottom right corner of compose window.
3. Choose Templates and click the name of the template in the Insert template section.
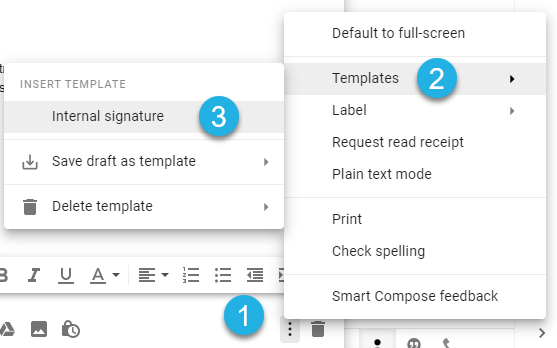
4.The signature will be added to your email.
Note: The process to insert your signature is the same when replying to emails.
Tired of opening your inbox and being overwhelmed by a seemingly never ending list of emails? Frustrated with trying to keep your inbox organised and find what you’re looking for amongst the chaos? Our Get efficient with Gmail the SMART way online course can help you take back control of your Gmail inbox for good!


