Do you often find yourself searching for online images to use and then wishing you could remember where you found certain ones? This blog post will show you how you can curate a collection of these online images using the Chrome web browser so that you can easily access them anytime you like.
One of the things that used to annoy me a lot when I was teaching full time was the amount of time some of my students could waste searching for images online. Sometimes the search would lead them completely off topic, as they would find cute photos they liked or photos that intrigued them – and off they would go on a tangent. Sometimes this curiosity was awesome, but more often than not we were time poor and needed to focus on the job in hand!
[bctt tweet=” Learn how to easily curate a collection of #digital images from online sources” username=”donnagolightly1″]
If only I had known about this feature in Chrome back then.
Here’s how it works:
Step one:
Enter the word you are searching for an image of, click on ‘Images’.

Step two:
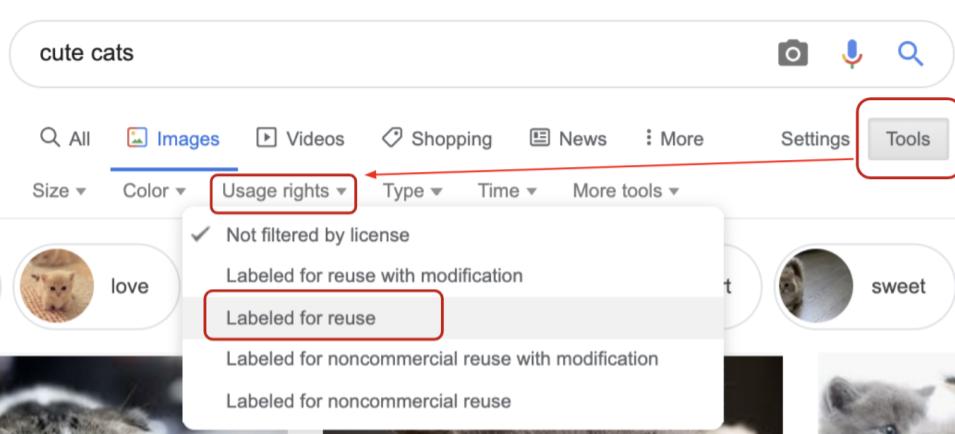
Click on ‘Tools’ then ‘Usage Rights’ and select ‘Labeled for reuse’
This is a really important step as it’s teaching your students about digital citizenship – they can’t just take any image from the Internet. It’s important that they learn about this and know how to find the ones they are legally allowed to use.
[bctt tweet=” Teach your Ss to use #digital images licenced for reuse.” username=”donnagolightly1″]
Step three:
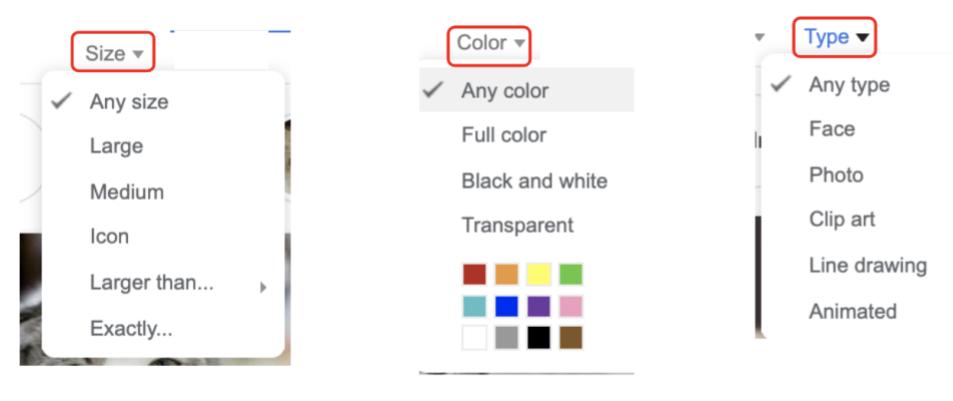
Notice that you can also search by size, colour or type.
You can apply as many filters together as you like.
[bctt tweet=” Apply filters to image searches in #Google #Chrome!” username=”donnagolightly1″]
Step four:
Once you have found the image you want to use – and be able to get back to quickly again – click on it to open it.
Notice to the right you have the option to ‘Add to’ and you have ‘Collections’.
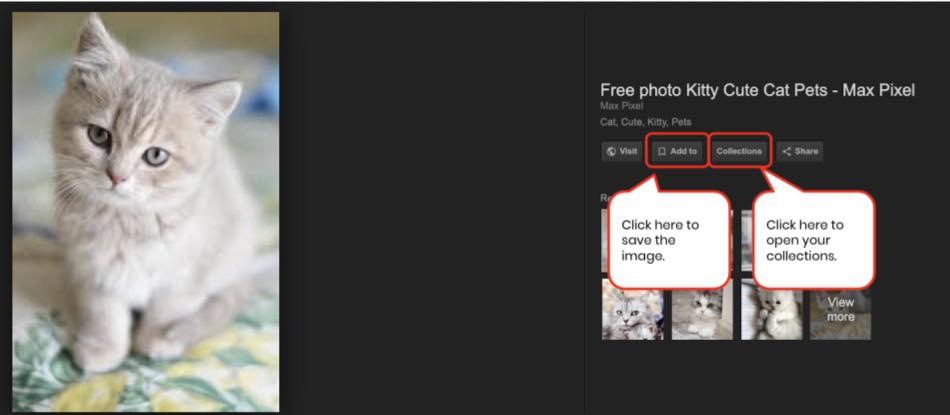
If you click on ‘Add to’ it will add the image to your collection.
If you click on ‘Collection’ it will take you to all the images you have collected.
[bctt tweet=” Use #Chrome Collections to curate collections of #digital mages that you can reuse easily!” username=”donnagolightly1″]
Step five:
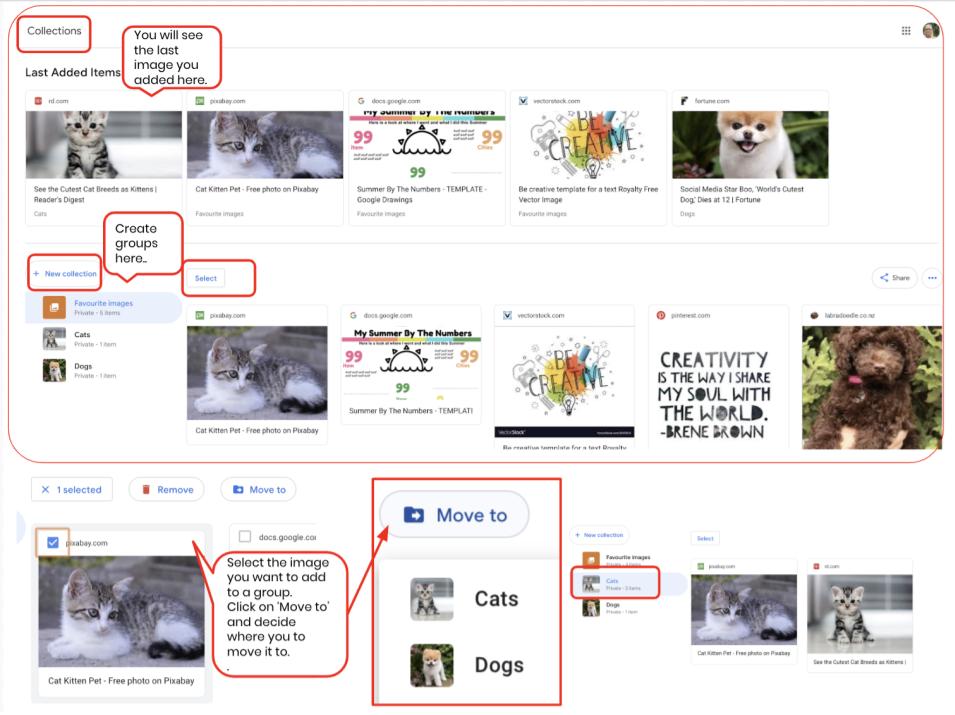
Once you have collected images you are able to organise them also. They will appear in your list of ‘Last Added Items’, but you can also move them to a collection of their own.
Step six:
And now the best part – you can share a collection with your students so they no longer have to spend time searching the web!
Once you have all the images you want added to a collection there is a ‘Share’ button on the far right-hand side.
You can email people directly – it will even suggest some contacts for you, or you can copy the link to the collection at the bottom of the share menu.
[bctt tweet=” Share collections of #digital images quickly and easily with your Ss!” username=”donnagolightly1″]
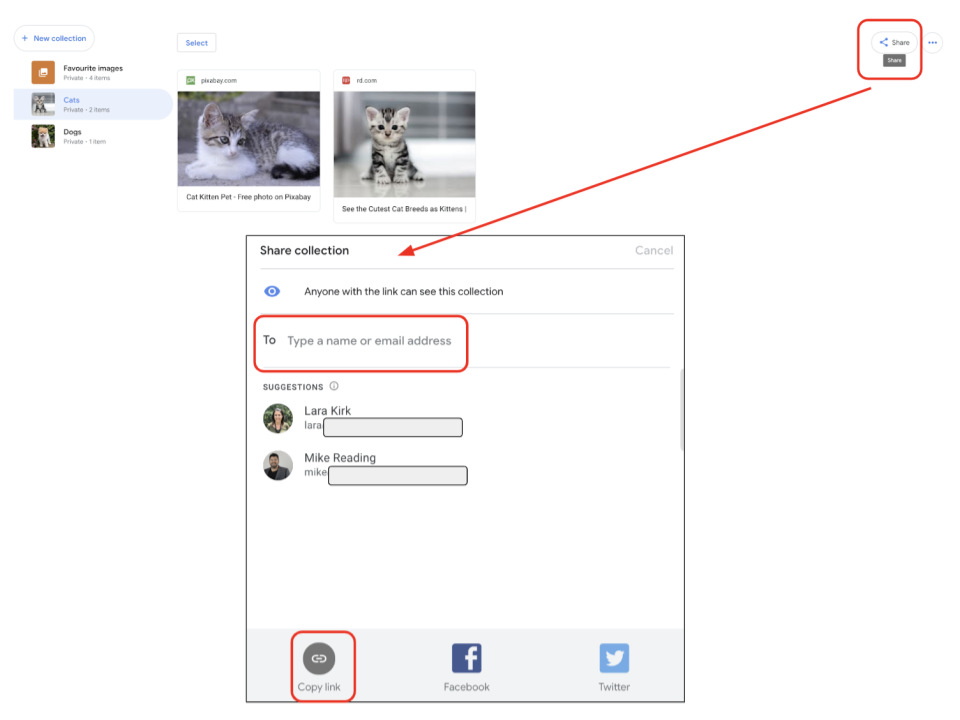
Inside the 3 dots is an option to rename a collection, remove a collection or change the settings.

To get back to your saved collections at any time there are two options:
1. Go to google.com/save. So long as you are signed in to your Chrome account it will take you straight to them!
2. Navigate to your collections from the app launcher in your account. (If you don’t see it at first, click on more and scroll further down.)
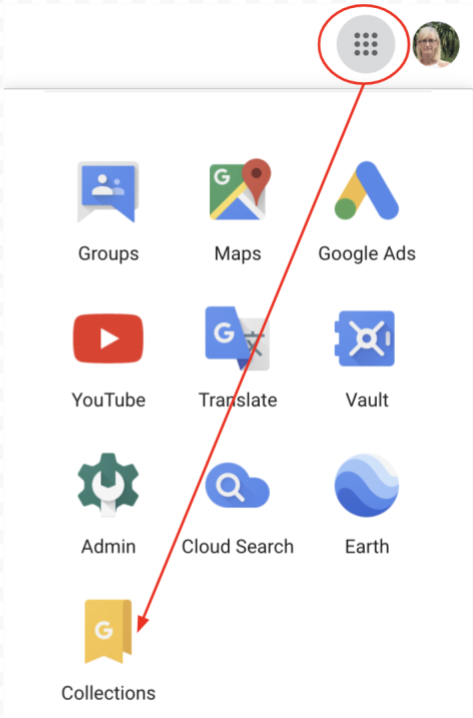
Next time you want your students to use some images from the Internet think about whether creating a collection and sharing it with them, or with your colleagues, might be a more helpful way of doing it.
For more ideas on working with images that you are legally able to reuse, check out Sam’s blog here on how to get free images in Word or PowerPoint or this one that talks about five sites to find free high quality images.
