
If you often have students visiting your office outside of class time, you’ve probably noticed things can get a bit hectic. Whether it be students queuing in the hallway to ask a question before an assessment, or rushing in while you’re mid-way through your lunch to get work signed-off, the timing can often be inconvenient to all involved. Wouldn’t it be great if you could get students to schedule a time with your first? Better yet, one that you had predetermined to be OK?
The appointment slots feature in Google Calendar can deliver both of these things. It lets you nominate specific times in your schedule that other people (such as students or colleagues) can book. Asking students to use this method can eliminate the queues outside your door and make sure you get to eat your lunch uninterrupted.
Appointment slots are also a great way for school and university services to schedule appointments with students. For example, use them to book one-on-one career or course counselling sessions.
[bctt tweet=”Sick of interruptions? Use the appointment slots in #Google #Calendar to schedule time with students & colleagues” username=”samvardanega”]
Prerequisites
Appointment slots are only available to schools or universities who are using G Suite for Education. The slots must be created with a G Suite account, however any Google account can be used to book them.
Creating appointment slots
1. Open your Google Calendar.
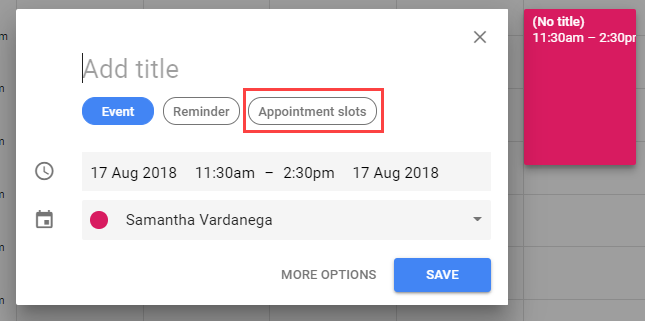
2. Click in a time slot, or click and drag to select multiple hours. The new event box will open. Click the Appointment slots link.
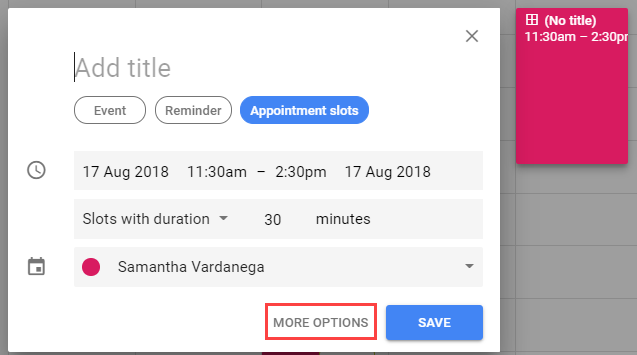
3. Click More options.
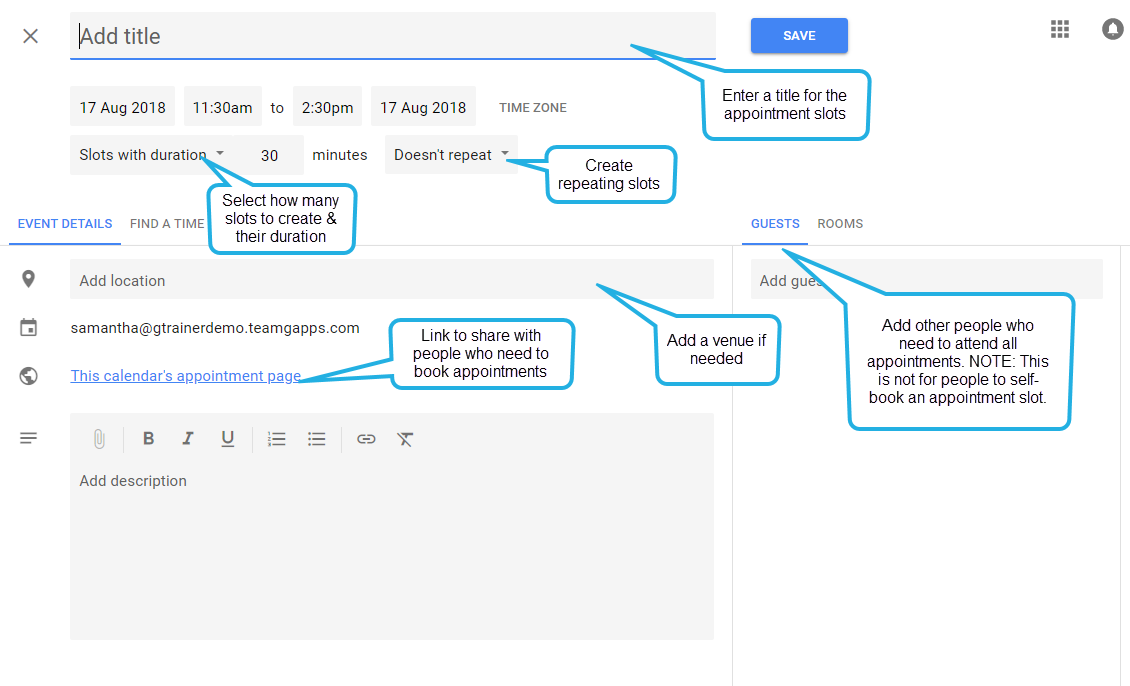
4. Enter the details of the appointment slots. Use the image below to guide you. Click Save when you’re done.
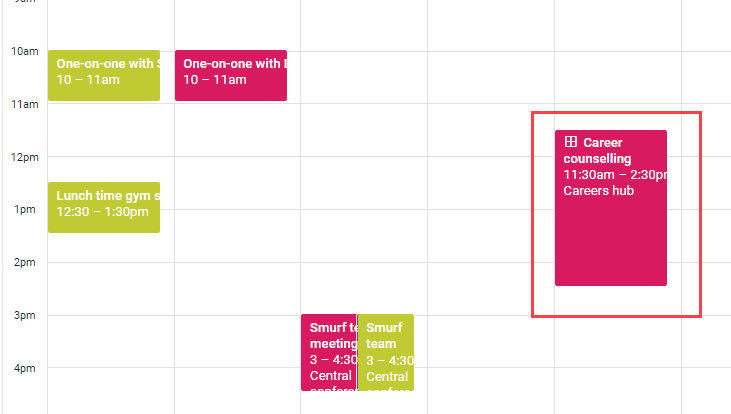
5. The appointment slots will be displayed in your calendar.
[bctt tweet=”Here’s how to schedule time with students using appointment slots in #Google #Calendar” username=”samvardanega”]
Sharing the booking link
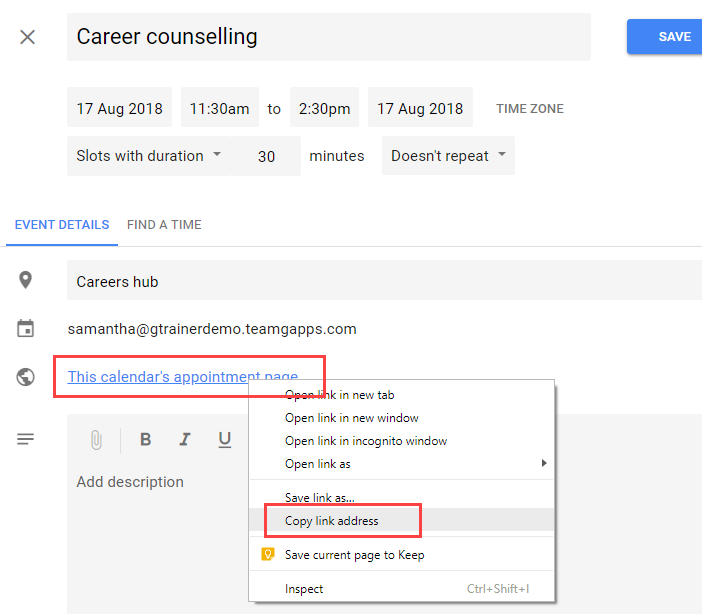
Now that you have created your appointment slots, you need to let your students know how to book an appointment with you. To do this, give your students the link to the calendar’s appointment page. You can find this link by opening the appointment slot in your calendar. To easily copy the link, right-click ‘This calendar’s appointment page’ and choose the Copy link address option. You can then paste this link anywhere you need it.
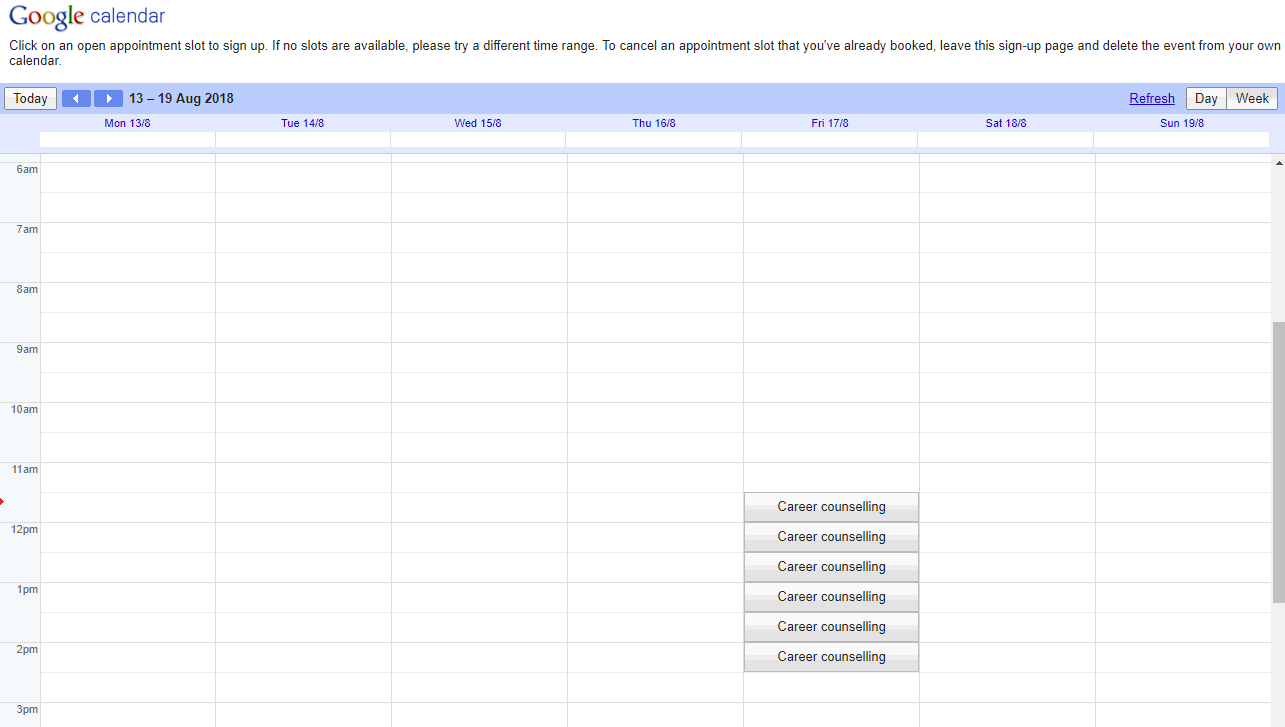
The appointment page shows all your appointment slots. Students can click on their desired time to make a booking.
Here’s a few ideas for sharing the calendar appointment page link with your students:
– Send it via email.
– Post it in Google Classroom or your class learning management system.
– Include it in a course guide or unit outline.
– Stick it on your office door.
– Display it during class.
Tip: If the link is going to be displayed on your door, in class or printed in a course guide, you’ll want to shorten the long URL to something easier to type. Use a URL shortener such as goo.gl or bit.ly to produce a short URL. You could also create a QR code.
View your bookings
When one of your appointment slots is booked, an individual event for that slot is created in your calendar. It is displayed on-top of the bulk appointment time. The timeslot is removed from the booking link so no-one else can book it.
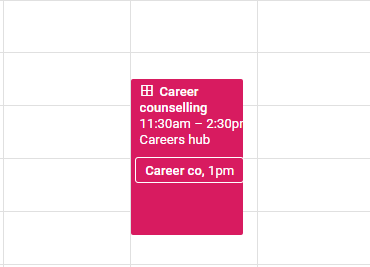
Open the event to view details of the booking, including who has booked it and any notes they have made.
You can edit or cancel the booking just like any other calendar event. This will send an email update to the person who booked the appointment.
Tip: Ask your students to add a note about their reason for wanting to meet with you when they book an appointment slot.
A few things to be aware of:
Only people who have a Google account can book appointments. This will make it difficult to use Appointment Slots with parents as you can not be sure that they all have Google accounts.
Make sure your calendar has notifications turned on. This way you will be informed when appointments are being made and cancelled.
You can invite others to attend your appointment. You can invite other teachers to be involved in the appointment by adding their email to the add guest box when creating the appointment slots.
If someone cancels an appointment it doesn’t automatically remove the event from your calendar. However, the person will be shown as note attending. If you want to delete the event from your calendar, click on the appointment slot event and then choose delete.
Get even more efficient with Google Calendar!
Want to learn more about Google Calendar? Check our our Google Calendar Deep Dive.
