In the 10+ years that I have been training people in email tools, I’ve discovered that many people use the same system to ‘manage’ their email. They open their inbox and take a look at their unread mail. They open a message and decide that it is something they need to action or follow up. But they don’t have time to do it right now. So they mark it as unread again so they don’t forget to do it. And then they repeat this process for a whole lot of other emails too. They then go off to a meeting, or perhaps to lunch, and come back to even more new, unread mail plus all the unread mail that they have already actually read but need to follow up. Is it any wonder their brains feel overloaded and their inboxes are out of control?!
If this sounds like your story of email management, you need a better way! In Outlook on the web, using a flag or categories is a much better way to tag messages that require follow up or action, meaning that your unread items can stay purely as emails you have not actually read yet! In this blog post, I’ll show how to use them as part of your email management routines.
Note: These same strategies can be applied to the Outlook desktop application on Windows and Mac too.
[bctt tweet=”Is your email ‘management’ system to mark messages as unread? Here’s a much better alternative in #microsoft #outlook on the web #office365″ username=”samvardanega”]
Flag
The Flag in Outlook on the web offers a very simple system for tagging emails. You put a flag on an email, then you view all the flagged items together. If you’re a Gmail user too, this is similar to using the ‘star’ feature. The idea is that instead of marking emails as unread when they require action, you would put a flag on them.
To add a flag to an email
There are numerous ways to add a flag in Outlook on the web, choose the one that works for you:
- Hover over the email and click the Flag icon on the quick actions menu that appears next to the sender name.
- Right-click the email and choose Flag.
- Open the email, click the three dots button at the top and choose Flag.

To view all flagged emails together
Click on the Filter button at the top of the inbox, then choose Flagged.
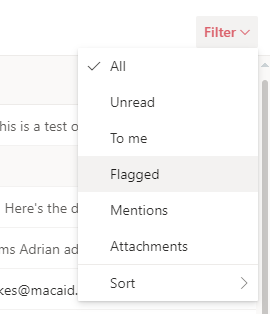
This system is simple for sure. However, I personally struggle with it because I have to remember to use the flagged filter to see all my flagged emails. Also, the little flag icon doesn’t stand out very much in my email list, so I can easily pass over emails that are flagged. If you’ve got similar concerns, read on to learn how categories can help!
[bctt tweet=”Use a flag in #microsoft #outlook on the web for a simple way to identify emails you need to action #office365″ username=”samvardanega”]
Categories
Outlook on the web includes six default categories: Blue, Green, Purple, Yellow, Orange and Red. You can use these categories as a really effective alternative to marking emails as unread when they require action.
You can view or apply categories by opening an email and clicking the Categorise button.
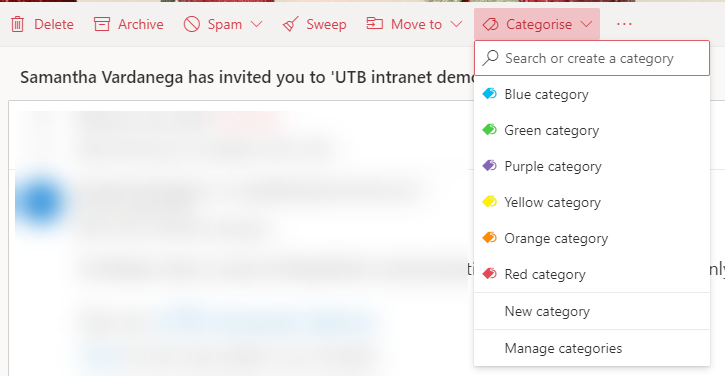
When you apply a category to an email, it is displayed as a little label next to the email subject. This is very similar to how labels are displayed in Gmail, and is much easier to see than the little flag!

[bctt tweet=”Use custom categories in #microsoft #outlook on the web as a much more effective alternative to marking emails as unread when they need action #office365″ username=”samvardanega”]
Customising categories
The real power of categories for email management is when you create your own custom categories with meaningful names!
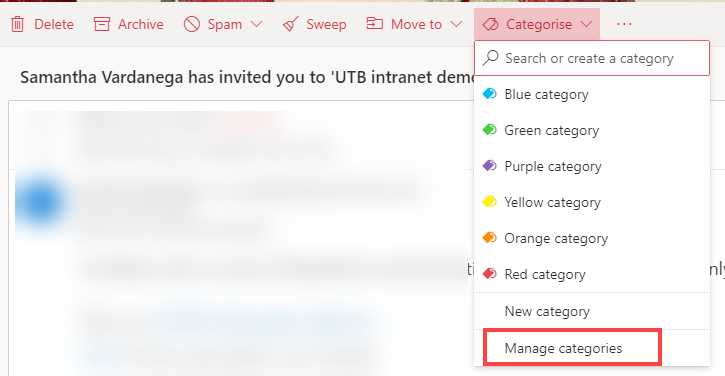
1. Click on the Categories button, then choose Manage categories.
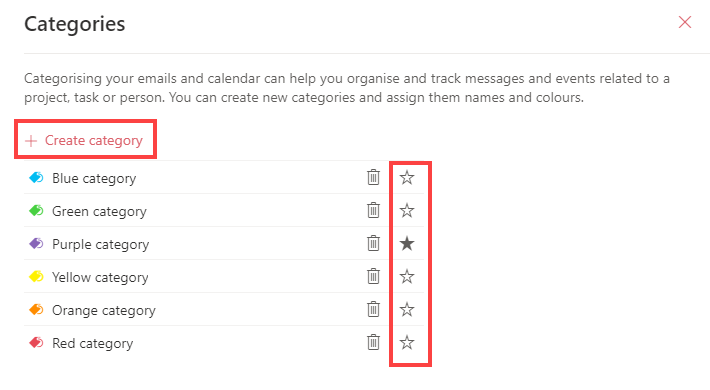
2. Click the Create category button to add a new category. I’m personally a fan of some of the action-orientated wording suggested in the Getting Things Done methodology – words like ‘Follow up’, ‘Action’, ‘Waiting for’ etc.
Tip: ‘Waiting for’ is a great category to use for emails that you are waiting for other people to action or reply to.
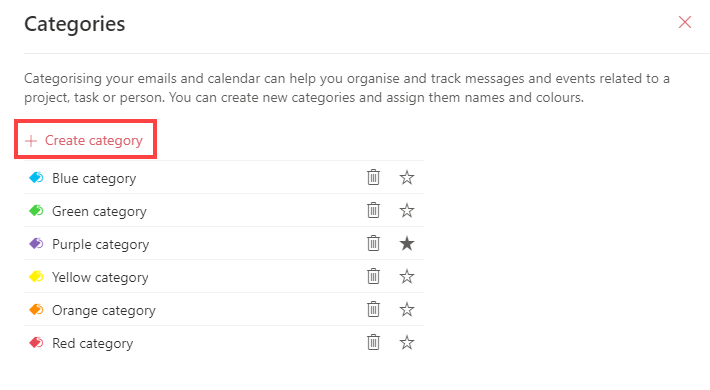
3. Once you have created your new category, click on the label icon to choose a colour.
Tip: You may like to delete the existing standard categories if you want to use the same colour for your custom categories.
Viewing all emails in a category
There are a couple of different ways to view all the emails in a category, choose the one that works for you:
- Click the category label on any email and it will open a list of all emails tagged with that category.
- Type category:”category name” in the search box. Once you have used this once, it will likely pop up in your history when you click in the search box.
- Too hard? Read on to find out how to make your categories even easier to use!
Adding a category to your Favourites list for easy access
If you want to make it even easier to see and use your categories, you can add the category as an item in your Favourites list. This list sits right at the top of Outlook on the web. There are two ways to add a category to your Favourites list:
If you have already created the category
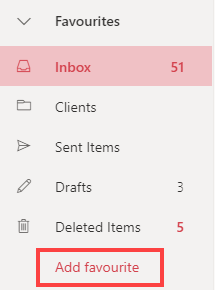
Click the Add favourite link at the button of the Favourites list. Start typing the name of the category then choose it from the options that appear.
While you are creating the category
Click the little star icon on the right hand side of the category name.
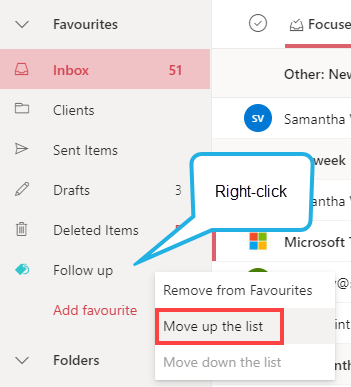
After you’ve added the category to the Favourites list, you can right-click it and choose Move up the list to move it to a higher position where it is easier to see and remember to use.
So there you have two options that can help you break free of the ‘mark unread’ cycle! If you are an Outlook desktop user, you may also like to check out our articles on how to organise your folders in Outlook for Outlook for Windows and Outlook for Mac.


