If your organisation has recently transitioned to Google Workspace, you might be wondering about what to do with your document, spreadsheet and presentation templates.
Existing templates can be converted to Google format (Docs, Sheets and Slides) and stored in Google Drive, but what’s the best way to manage the distribution and use or Google Drive templates?
The are three main options for managing Google Drive templates:
- Use the Template Gallery
- Use a view-only shared folder(s) or Team Drive(s)
- Use view-only shared folder(s) or Team Drive(s) in conjunction with a Google Site index
Option 1 : Use the Template Gallery
Every G Suite domain has its own Template Gallery that can house templates in Google Docs, Sheets, Slides, Forms and Drawings formats. This makes it quick and easy for everyone in the organisation to access and use templates. However, note that at present there is only one Template Gallery for the entire G Suite domain – so everyone will be able access and use the same templates. If this is not desirable in your organisation, skip ahead to one of the other options.
View the Template Gallery
You can view the Template Gallery by either:
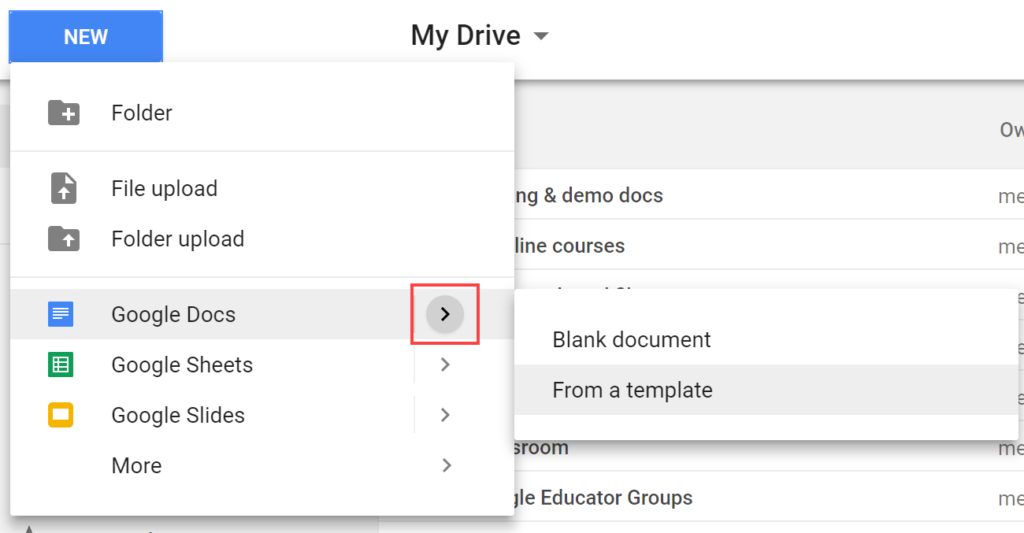
- Clicking on the New button in Google Drive, choosing a document type (e.g. Google Docs), then selecting the arrow button on the right > From a template.
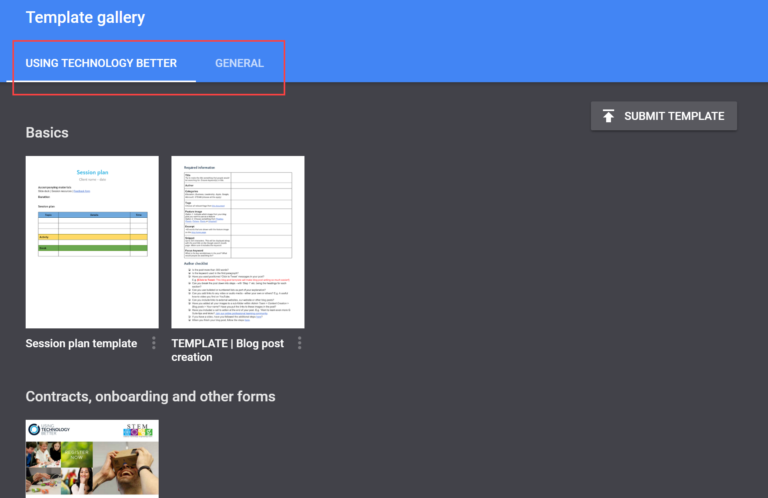
- Opening the Docs, Sheets, Slides or Forms web apps and clicking the Template Gallery button in the top right corner.
The Template Gallery has two sections, general templates and your organisation’s templates.
Using a template
To use a template from the Template Gallery:
1. Open Google Drive and click the New button.
2. Choose the document type your want (e.g. Google Docs), then click the arrow button on the right > From a template.
3. Find the template you want to use and click on it.
4. The template will open in the appropriate app – e.g. Google Docs.
5. Rename the file to suit your purpose, then choose a location to store it in using the Move to button.

Submitting templates to the Template Gallery
The domain administrator can specify who can contribute templates to the gallery. The default setting is that any user can submit a template. However settings can be changed so that templates need to be approved before being added to the gallery, or so only domain administrators can publish templates.
To submit a template to the gallery (assuming you have permission to):
1. Ensure that the file you want to make into a template is already stored in Google Drive.
2. Access the Template Gallery via one of the methods outlined above.
3. Click the Submit template button.
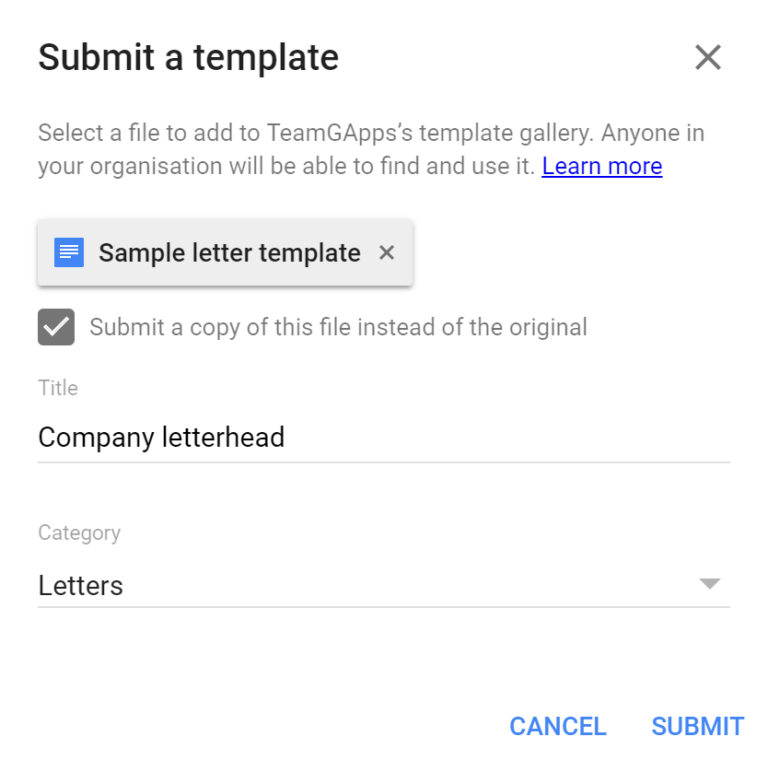
4. Click the Select a document button and browse for the file you want to add to the gallery.
Note: The template will be added with the same name as the original file. If you want to change the name, choose the option to ‘Submit a copy of this file instead of the original’ and choose a new name.
5. Choose a category for the template.
Note: The default categories can be modified by the domain administrator. Contact your IT team to discuss this further.
6. Click Submit.
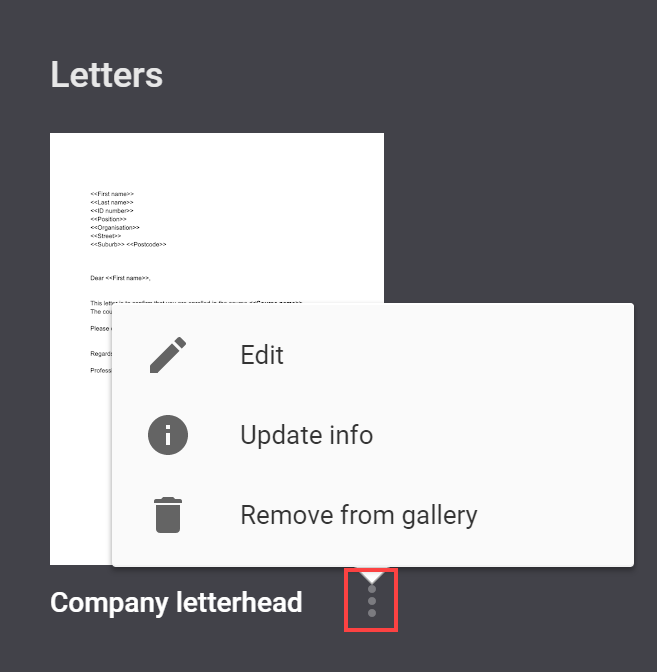
After the template has been submitted, you can use the three dot button below the template preview to edit the template file, change its category or remove it from the gallery.
Option 2: Use a View-Only Shared Folder(s) or Team Drive(s)
If the Template Gallery is not suitable for your organisation, you could use view-only Google Drive shared folders or Team Drives to store and distribute templates. This allows you to give different people in your organisation access to different sets of templates. It’s essential that most people only have view-only access to the templates, otherwise you risk people unwittingly editing the actual template! Only people responsible for updating the template should have edit permissions.
To use a template in this situation, open the file and then choose the File menu > Make a copy. Rename the file to suit your purpose and choose a location to store it. Then click OK.
Option 3: Use View-Only Shared Folder(s) or Team Drive(s) in Conjunction with a Google Site Index
This third option is an extension of option 2 that makes distributing and using templates more convenient.
By using a Google Site as an index of all your organisation’s templates, anyone in the organisation can quickly and easily find the templates they need. Further, by making a clever change to the templates URL, anyone accessing the template via the site will be able to copy it with just one click. The best part is that, even though all your templates might be listed in the one place, people will still only be able to access the templates they have permission for in Google Drive.
Here’s how to set it up:
1. Organise your templates in a shared Google Drive file or Team Drive, with view-only permissions.
2. Choose or create a Google Site to be a template index. This could be an existing site (such as your intranet) or a new site specifically for this purpose.
3. Add a text box to the Sites page and list the names of all your templates.
4. Visit each template and copy it’s URL from the address bar. It should look similar to the one below. Notice how the URL has the word ‘edit’ at then end?

5. Add the URL as a hyperlink on the name of the template in the Google Site. BUT…when you paste in the URL, change the word ‘edit’ to ‘copy’. Here’s an example:
Tip: You can also use the GAFE Force Copy Chrome extension to generate a /copy URL with just one click.
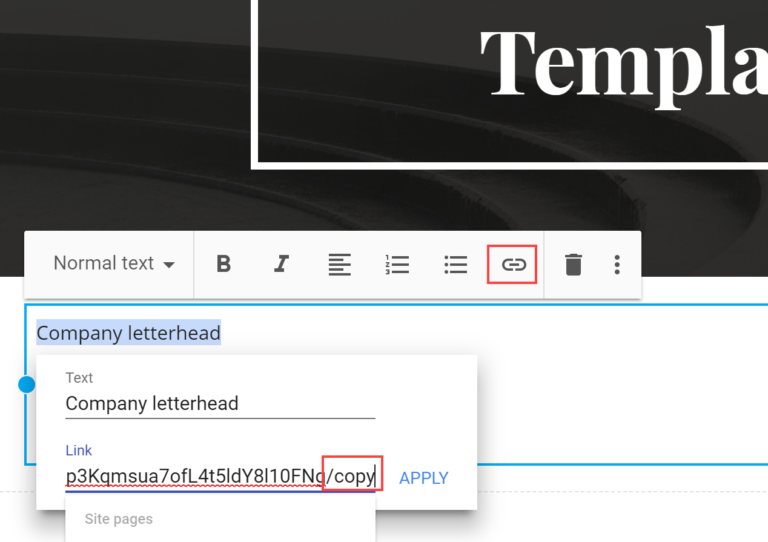
6. Repeat steps 4 and 5 above until all your templates are linked, then save and publish the site.
7. When someone clicks on any of these links, they will now be automatically prompted to make a copy of the template.

The end result of this option is your own custom template gallery tailored to the needs of your organisation.
Want to learn more about how to use G Suite in ways that meet the unique needs of your organisation? Contact us now to discuss how our customised G Suite training and consultancy can help.


