Scheduling and managing calendar events can sometimes be a time consuming and complicated task – particularly when large groups or very busy guests are involved. However, Google Calendar has several features specifically designed to make this process quicker and easier for both event creators and guests. In this blog post, I’ll share five of my favourite power tips for working with Google Calendar events.
1. Find a time and Suggested times tools
One of the hardest parts of scheduling events can be finding a time when everyone is available. Two ways you can do this within Google Calendar are the Find a time and Suggested times tools. These tools are most effective when used for events internal to your organisation, as they can only check availability on people’s calendars that you have access to.
Find a time
The Find a time tool will show you guest’s calendars side-by-side so that you can quickly assess their availability. It will also show the availability of any rooms you have added to the event.
To use this tool:
1. Select a date and time for the event and add the guests.
2. Click the Find a time tab.
3. Use the features shown below to view availability and update event details.
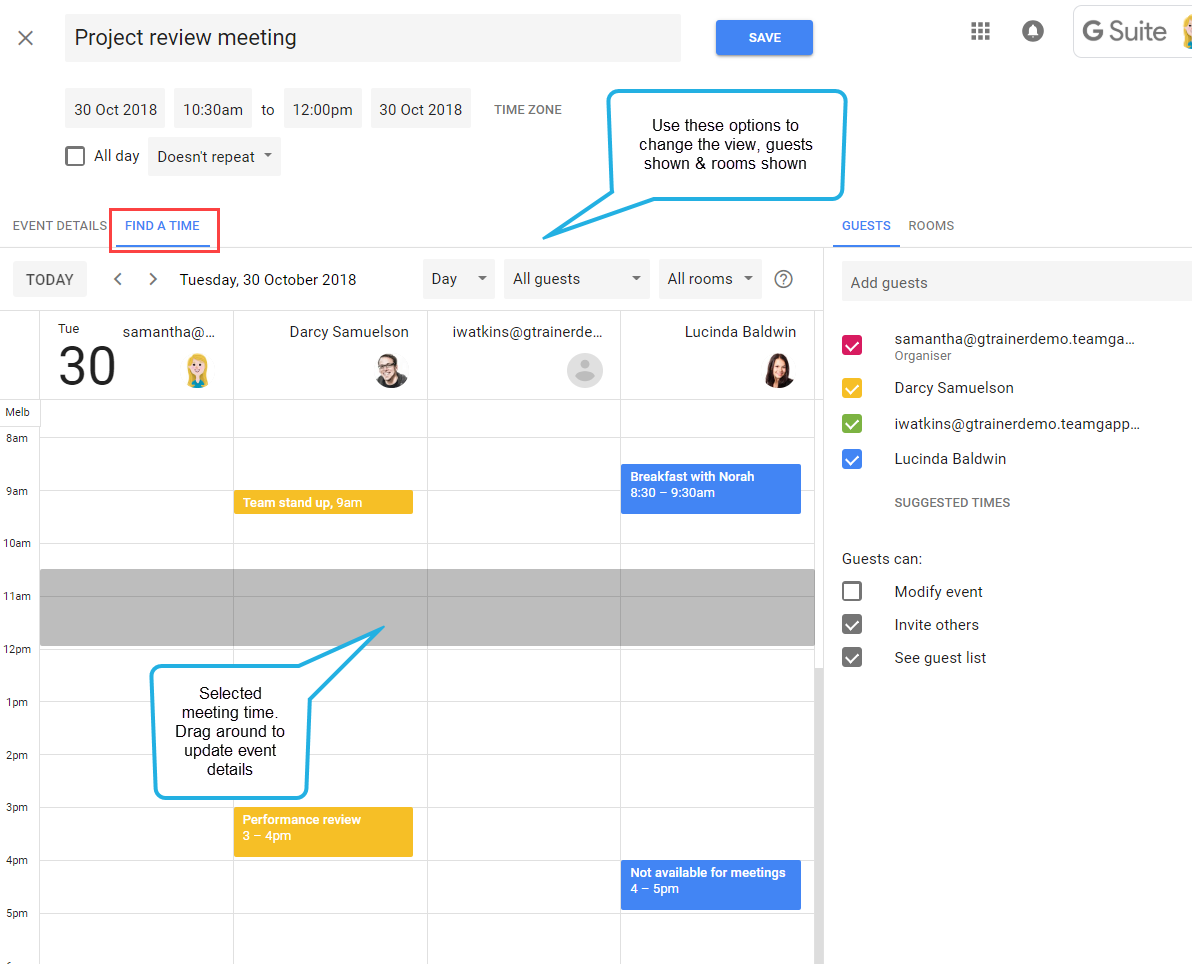
Suggested times
The Suggested times tool will automatically review guest availability and return a list of suitable times for the event.
To use this tool:
1. Select a date and time for the event and add the guests.
2. Click the Suggested times button beneath the guest list.
3. Click on a suggested time to update the event details.

[bctt tweet=” Use the Find a time and Suggested times features to make scheduling #Google #Calendar events quick and easy!” username=”samvardanega”]
2. Propose a new time
A recent and much-needed addition to Google Calendar is the Propose a new time feature. This lets invited guests suggest a new time for a calendar event. This option is a little hidden away, so event organisers may like to remind people where to find it.
To propose a new event time:
1. Click the calendar event once to display the event preview box.
2. Click the little arrow at the bottom right of the box.

3. Click Propose a new time.

4. Choose the proposed date and time and click the Send Proposal button.
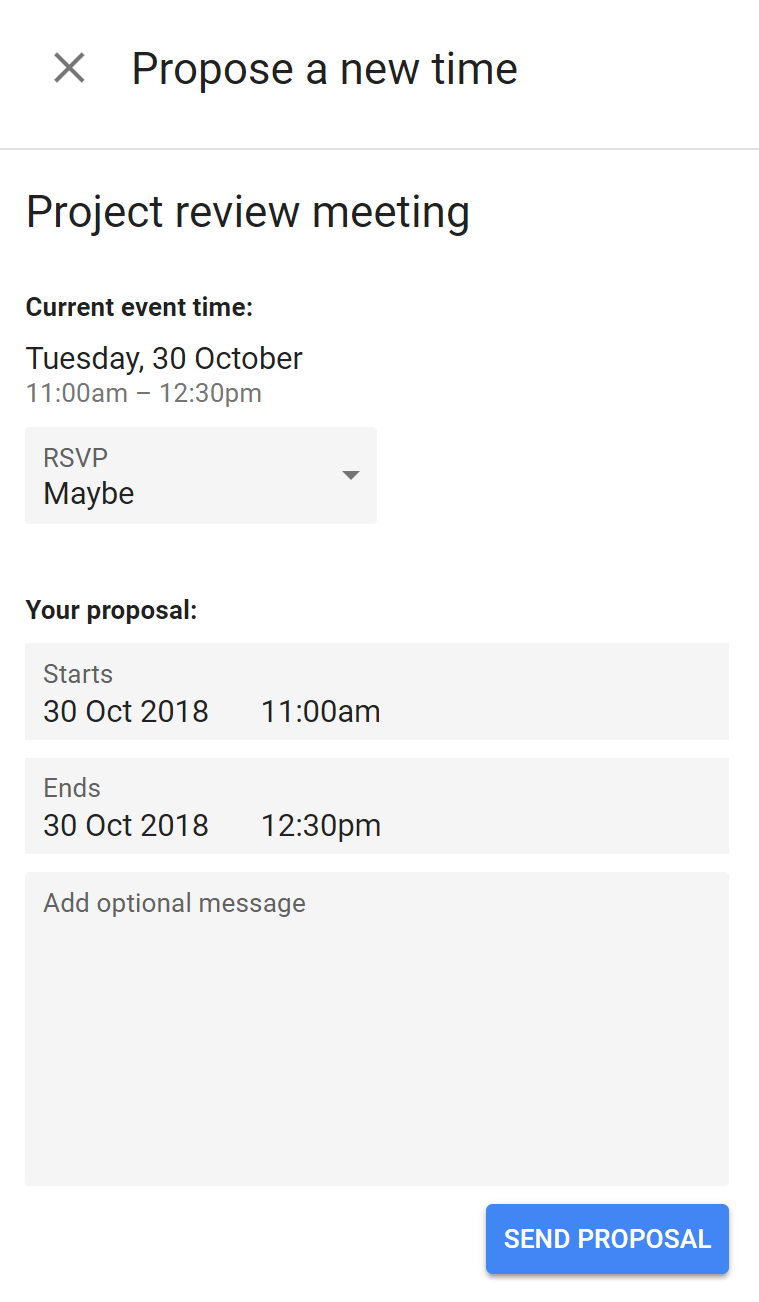
5. The meeting organiser will receive a notification of the proposed new time and can choose to change the event.
Note: The meeting organiser will only see an email notification about the proposed new time if they have the ‘Event reponses’ notification set to ‘Email’. You can find this option in the settings for your calendar.
[bctt tweet=”Invited to a meeting at a time that doesn’t suit? You can now propose a new time in #Google #Calendar.” username=”samvardanega”]
3. Add a note & additional guests
Both the event organiser and event guests can add notes along with their event responses (yes, maybe or no). This is a convenient way to record a comment on the calendar event, such as a later arrival time or attendance via video. While it doesn’t send an email notification, the note is visible to anyone who looks at the calendar event. This feature can also be used for event guests to notify the event creator that they will be bringing other people along – without needing to add their details to the guest list.
To add a note to an event (as a guest):
1. Click the calendar event once to display the event preview box.
2. Click the little arrow at the bottom right of the box.
3. Click Add a note.
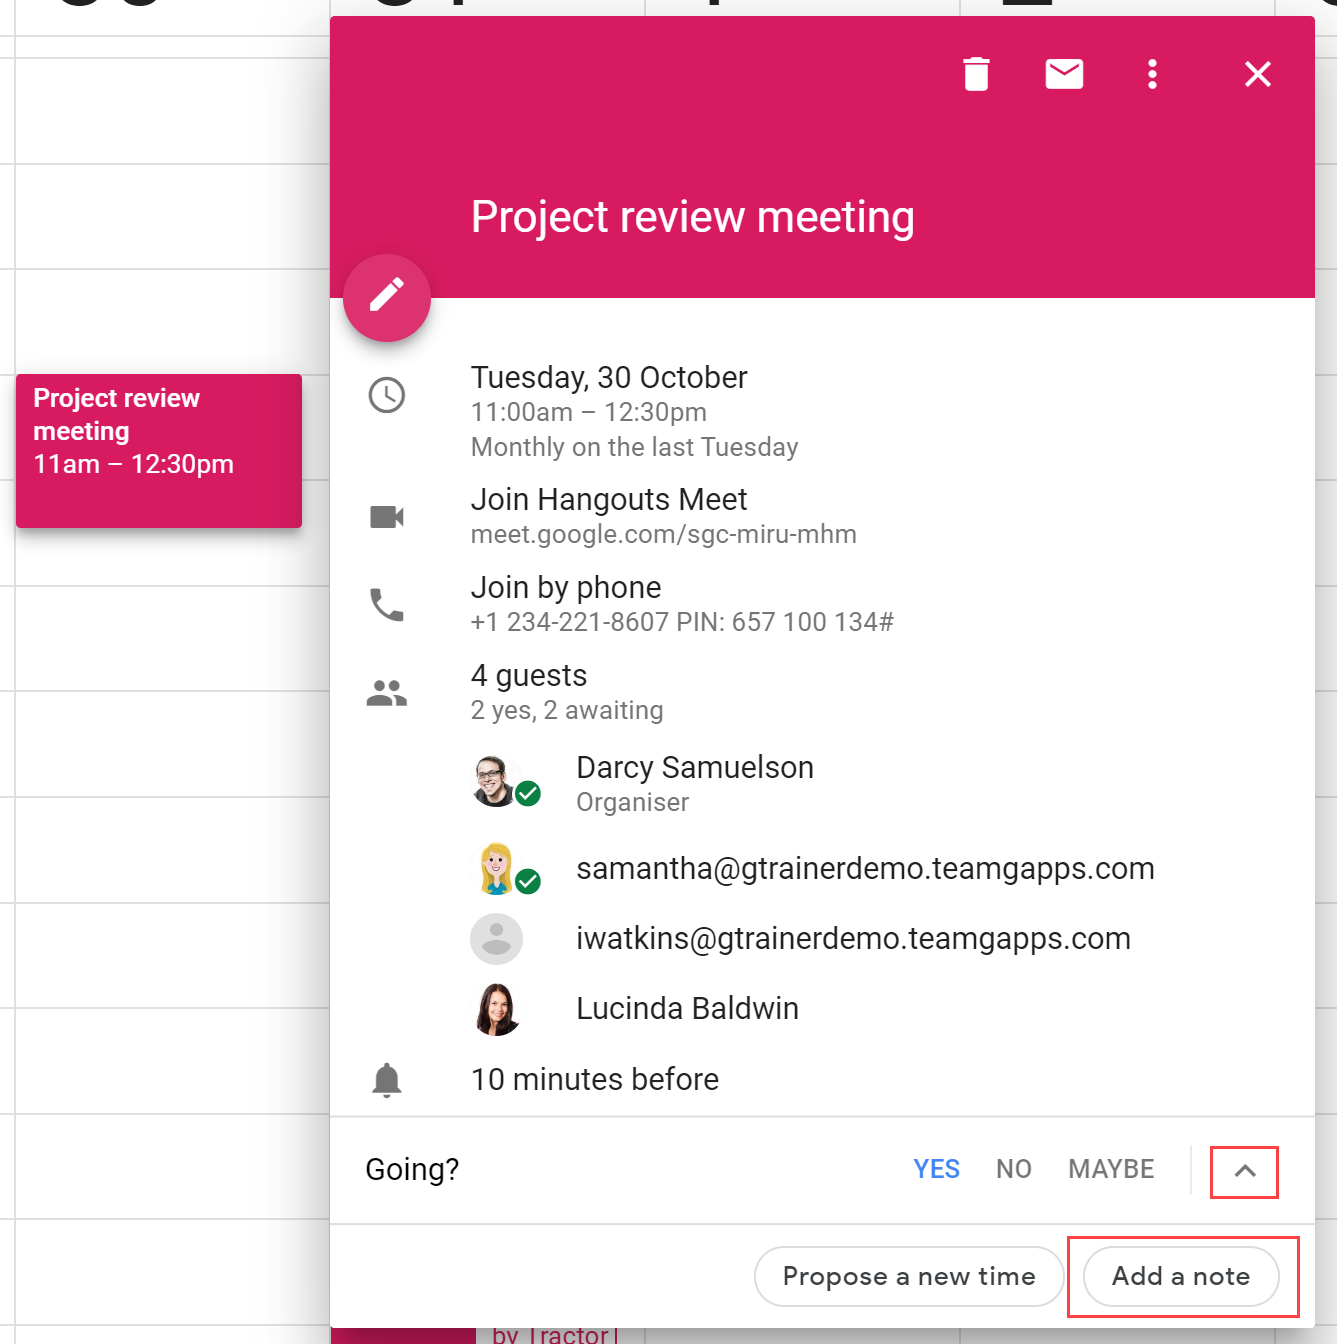
4. Enter your note and click Send.
5. The note will be shown underneath the person’s name in the guest list.
Tip: You can also add a note from the full event view by clicking the Add note/guests link.

To add extra guests to an event (as a guest):
1. Open the calendar event.
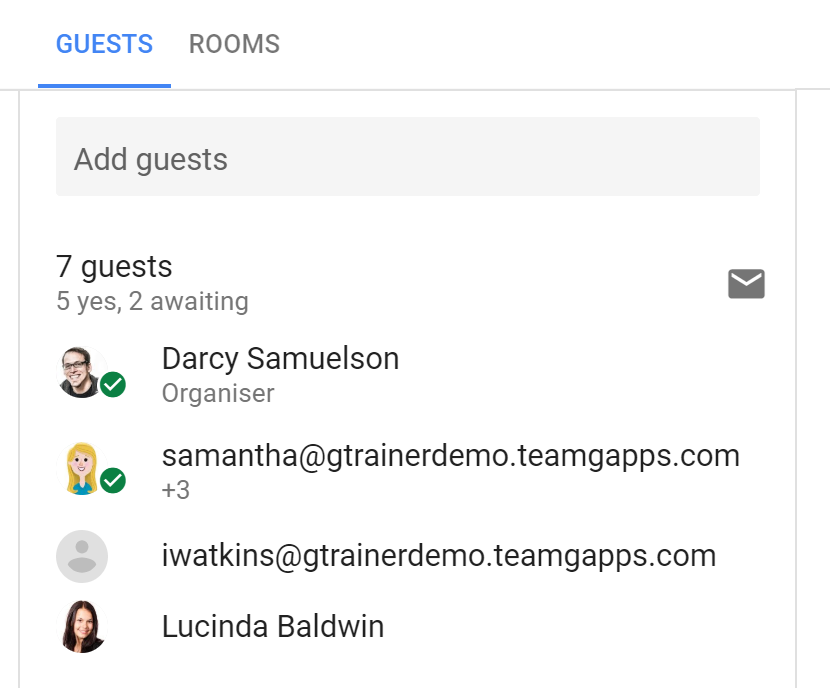
2. Click the Add note/guests button (above the guest list).
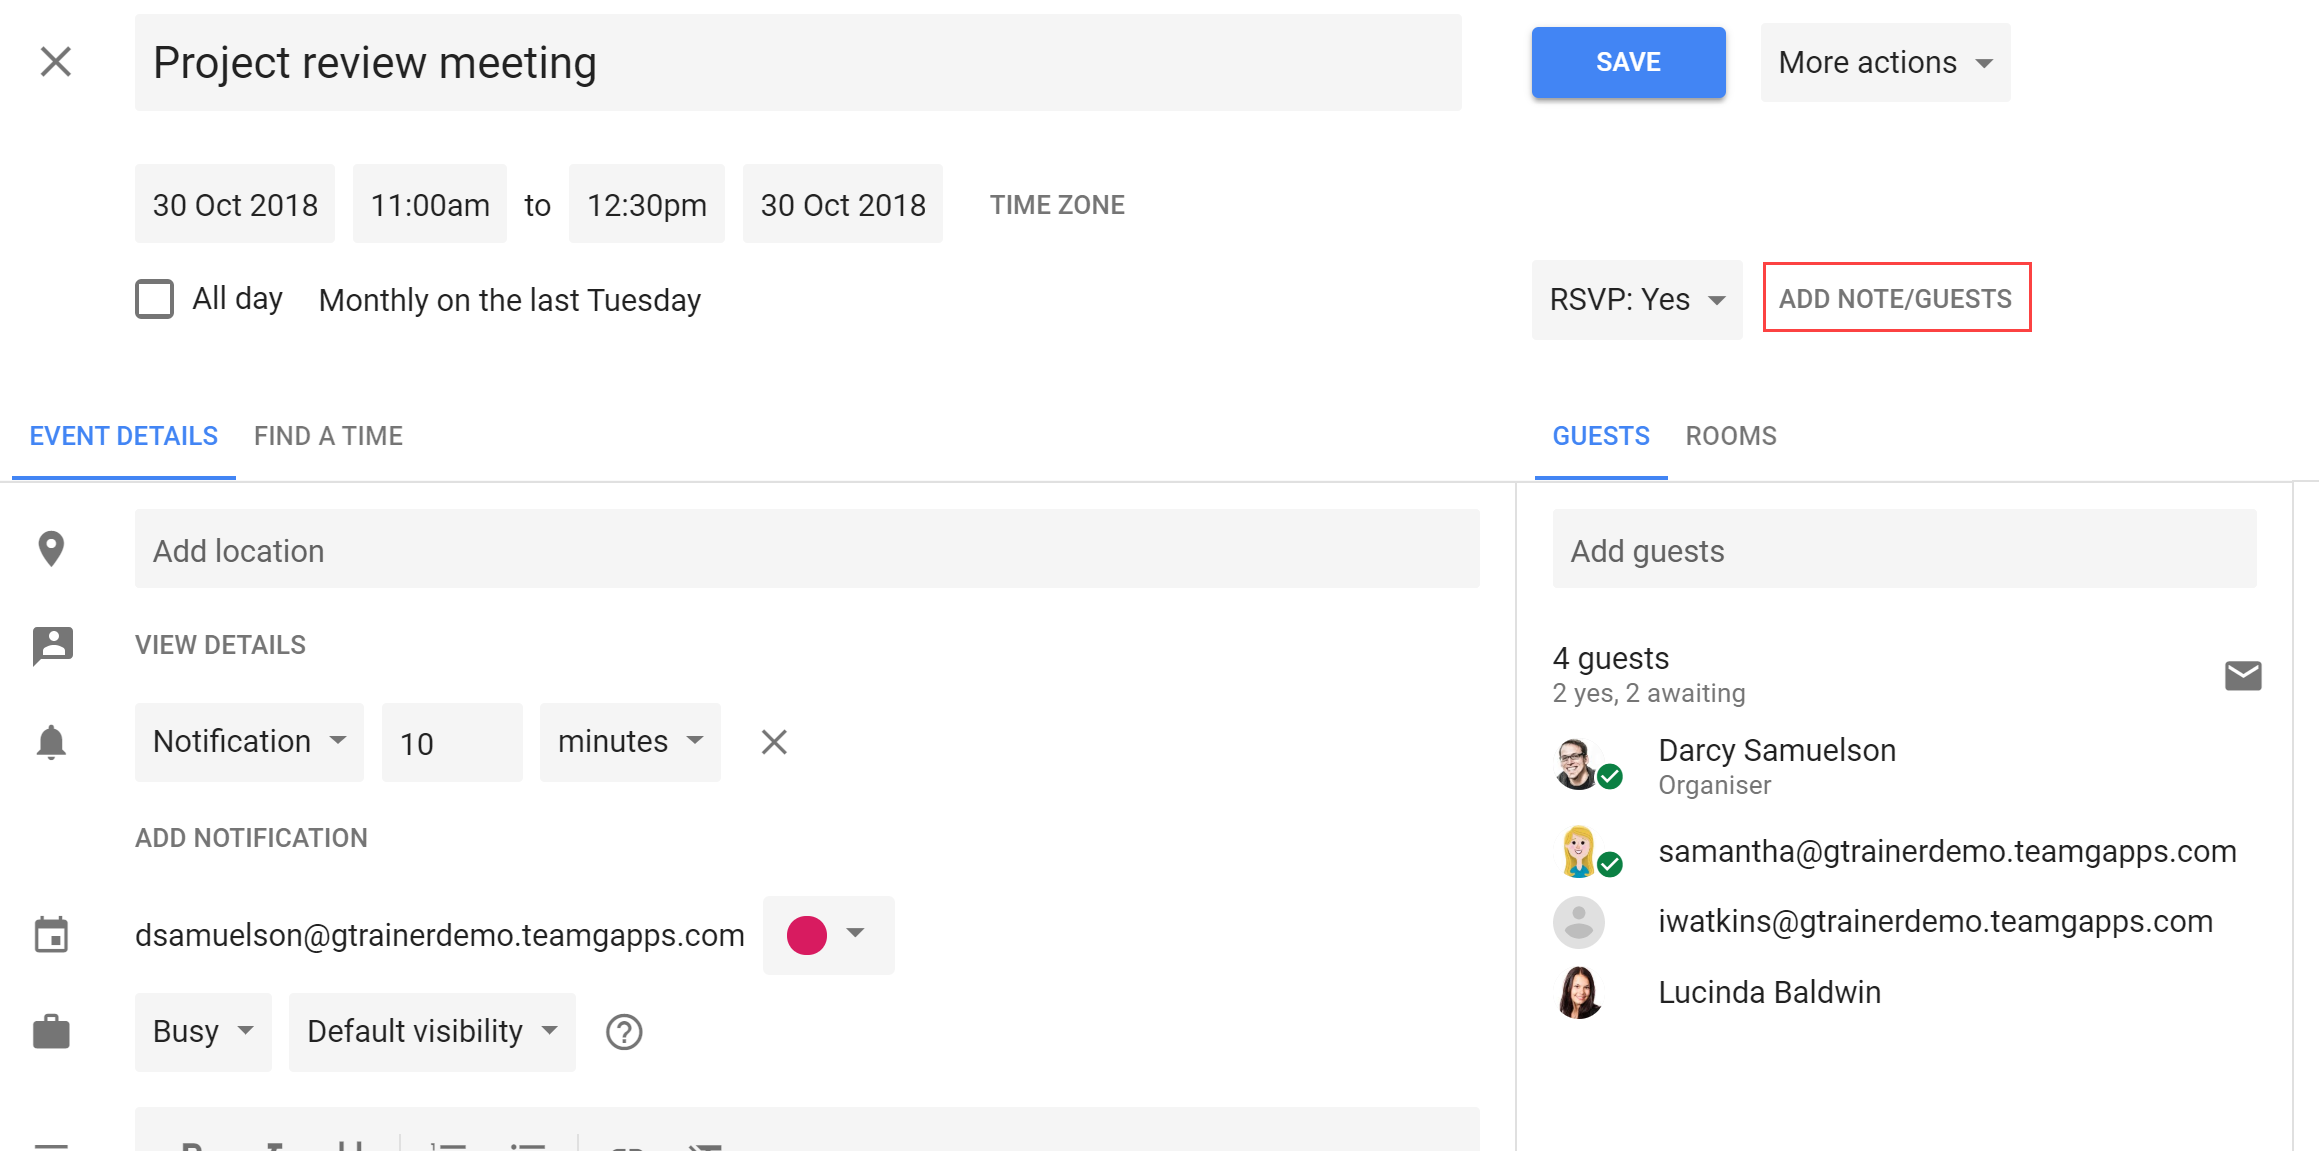
3. Enter the number of Additional guests attending and click Done.
4. The extra guests will be shown next to the person’s name, and the total guest count will be updated.
[bctt tweet=”Here are five power tips for working with events in #Google #Calendar” username=”samvardanega”]
4. Email guests
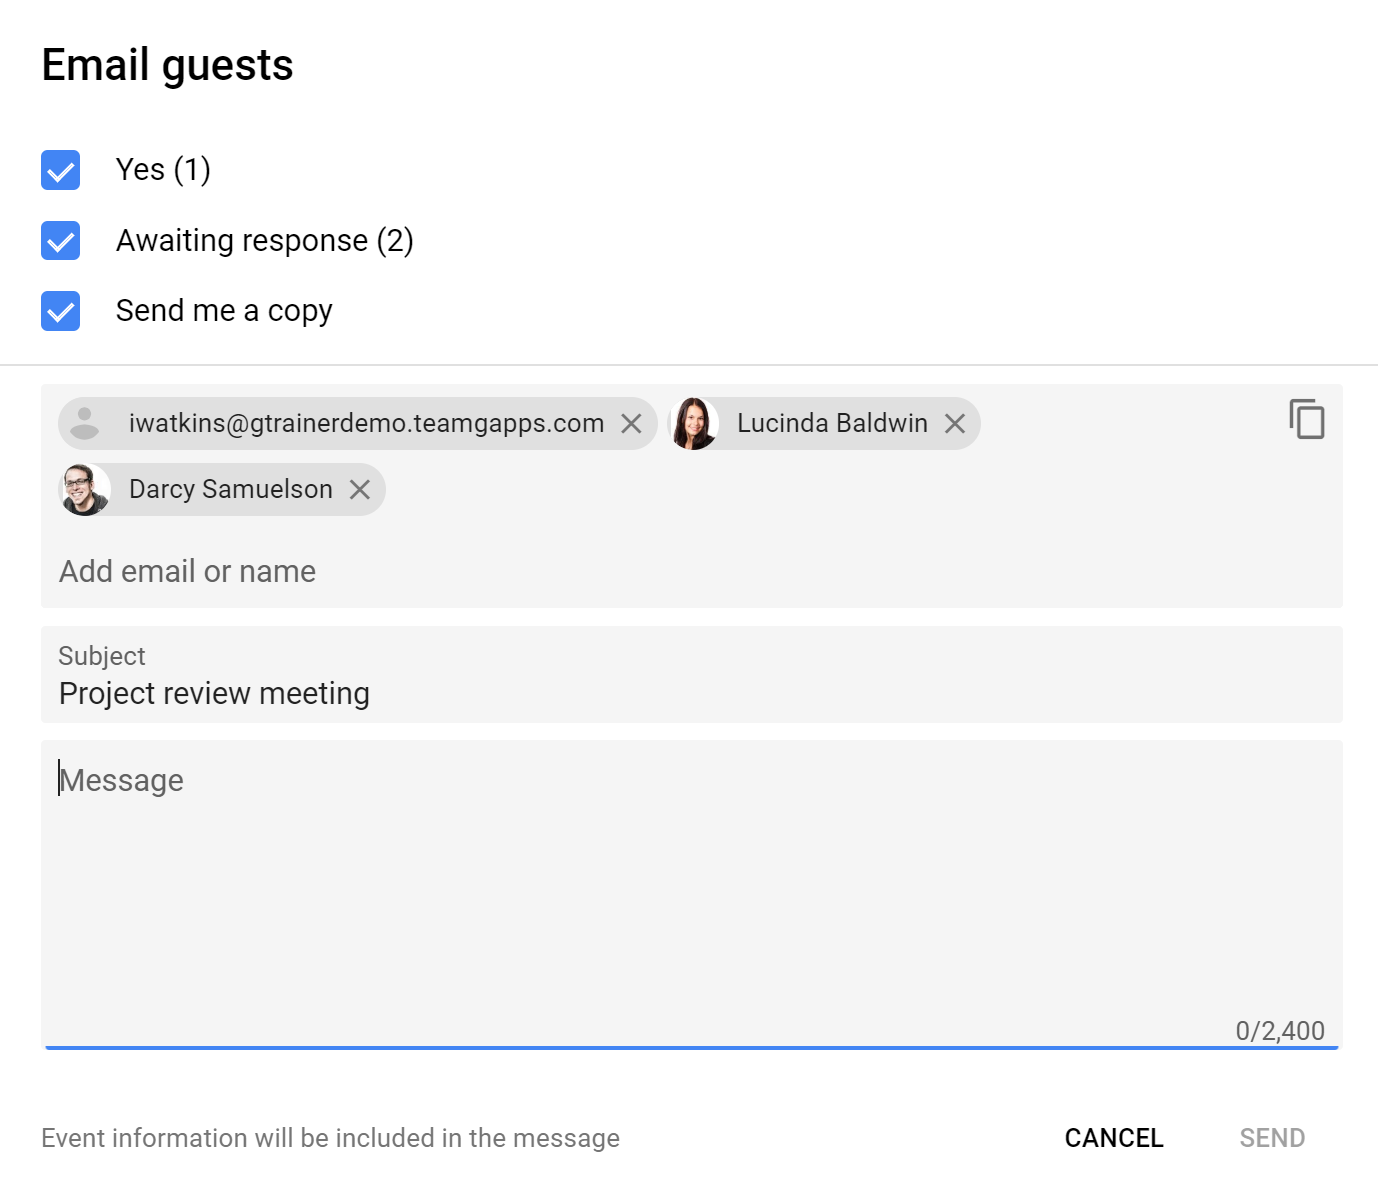
The email guests tool is a quick and easy way to send extra information to guests before, during and after an event. It is far more efficient than composing a new email in Gmail and adding everyone as recipients! You can also choose to email only people who have responded in a certain way or everyone.
To email event guests:
1. Click the calendar event once to display the event preview box.
2. Click the envelope button at the top of the box.
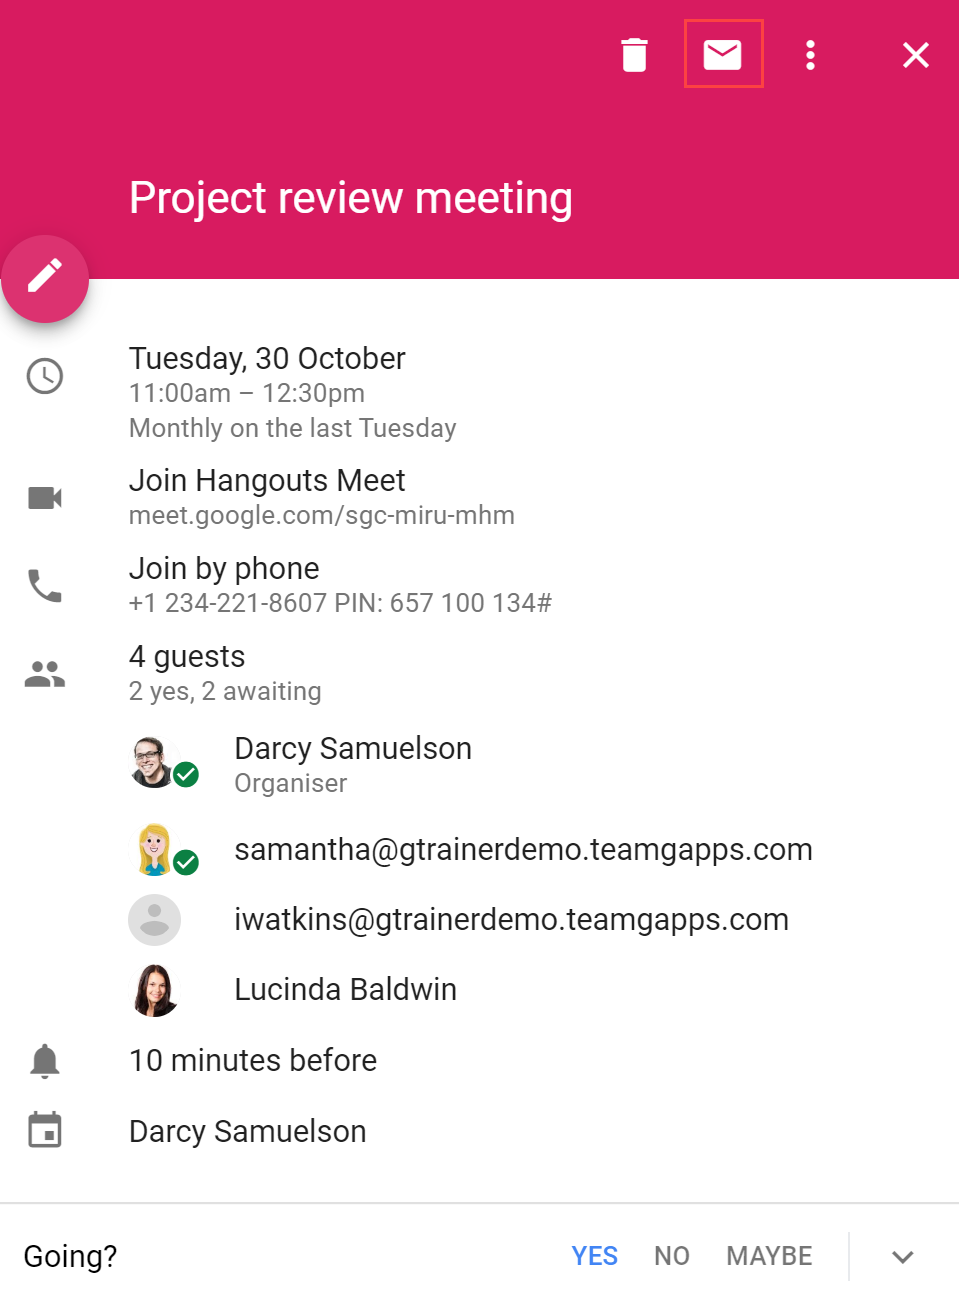
3. Choose who to email, enter the message and click Send.
Tip: You can also use the ‘copy’ icon in the recipient box to quickly copy everyone’s email address. This is handy when sharing Google Drive files with event guests.
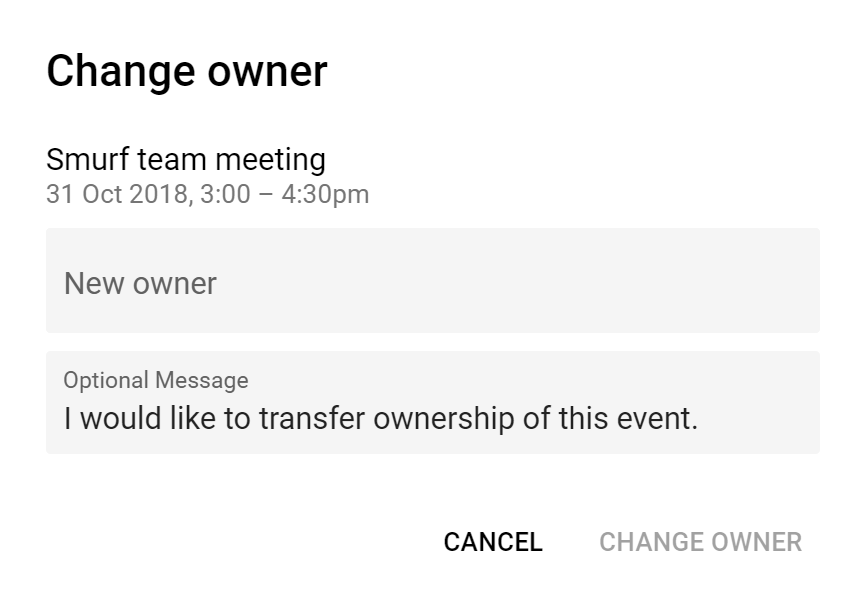
5. Change the event owner
If you have scheduled an event on behalf of someone else, or are no longer managing the event, it is a good idea to change the event owner. This ensures that the person who is managing the event has full control over it. Ownership of an event can be changed to any other person within your organisation.
To change the ownership of an event:
1. Click the calendar event once to display the event preview box.
2. Click the More (three dots) button at the top of the box.
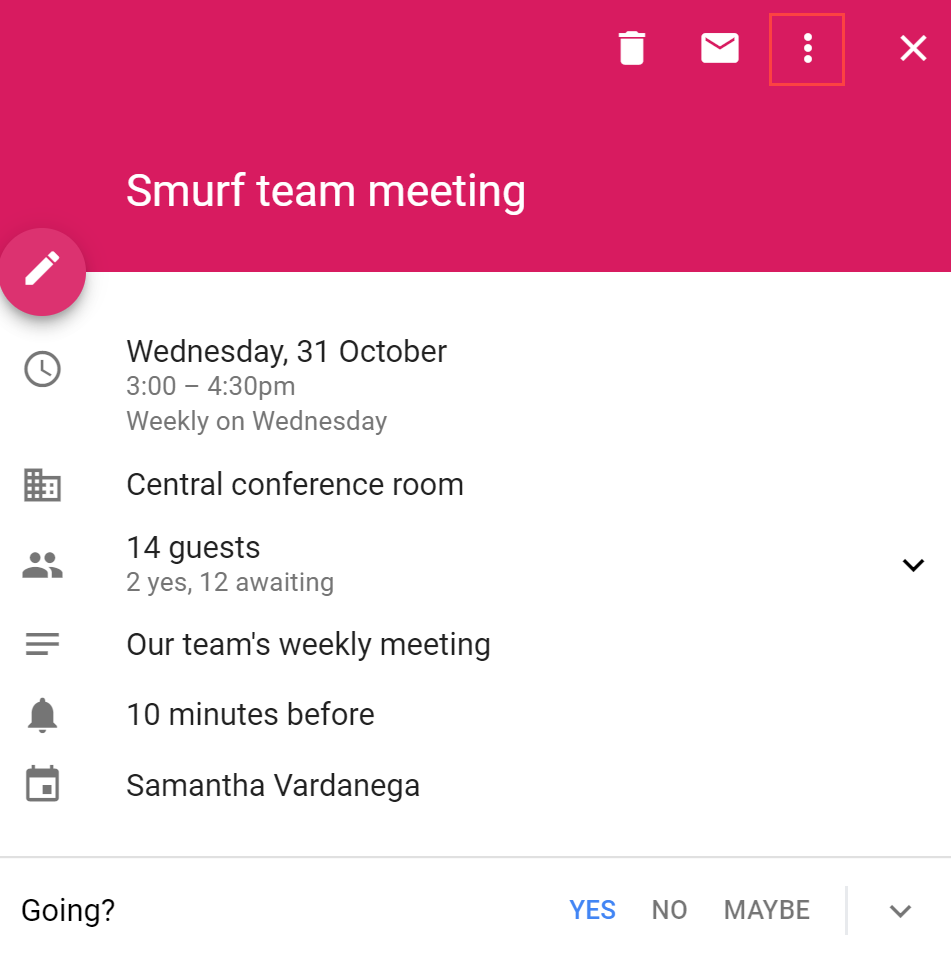
4. Enter the email address of the new owner and click Change owner. The new owner will get an email notification about the change.
Want more Google Calendar tips? Check out this post on working across multiple time zones!


